
After completing a major kitchen upgrade like installing a new benchtop, painting the cabinets or tiling a splashback, door handles may seem like a minor item.
But cabinet hardware is the bling of the kitchen. Just updating handles and knobs can give the room a fresh new look, and the impact is even greater if the cabinetry has been revamped or the doors upgraded.
One of the last jobs on the kitchen makeover to-do list it’s also one of the most important and essential to get right the first time as hardware is so visible. Follow our guide to installing cabinet hardware like a pro.
Choose the right hole
Handle jigs feature dozens of holes to suit a range of spacing options and handle lengths.
To prevent disaster by using the wrong hole accidentally, apply masking tape and poke through only the ones you need.
Use an awl instead of a pencil to mark the holes, that way your drill bit won’t skate off the mark, even if you’re drilling into a hard vinyl wrap finish.
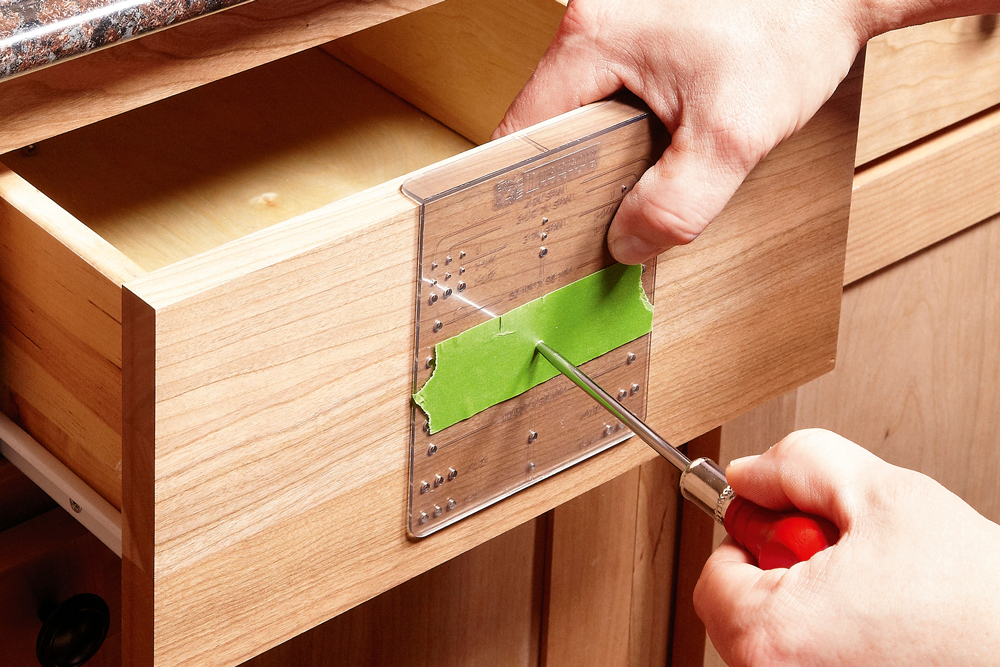
To prevent disaster by using the wrong hole accidentally, apply masking tape and poke through only the holes you need
Attach temporarily first
It’s too late to realise after you’ve drilled the holes that a handle creates an obstruction when the door is open, or is too high for comfortable use.
Stick on a few handles using Blu-Tack to make sure they are optimally positioned, then mark the locations and identify the most suitable holes to use on a handle jig.

It’s too late to realise after you’ve drilled the holes that a handle creates an obstruction when the door is open
Use a handle jig
Measuring and marking the location of every hole individually is tiresome and time consuming unless you only have to replace one or two handles.
Speed up the job and ensure accuracy with a handle jig, about $10 from hardware stores, or make your own using plywood offcuts.
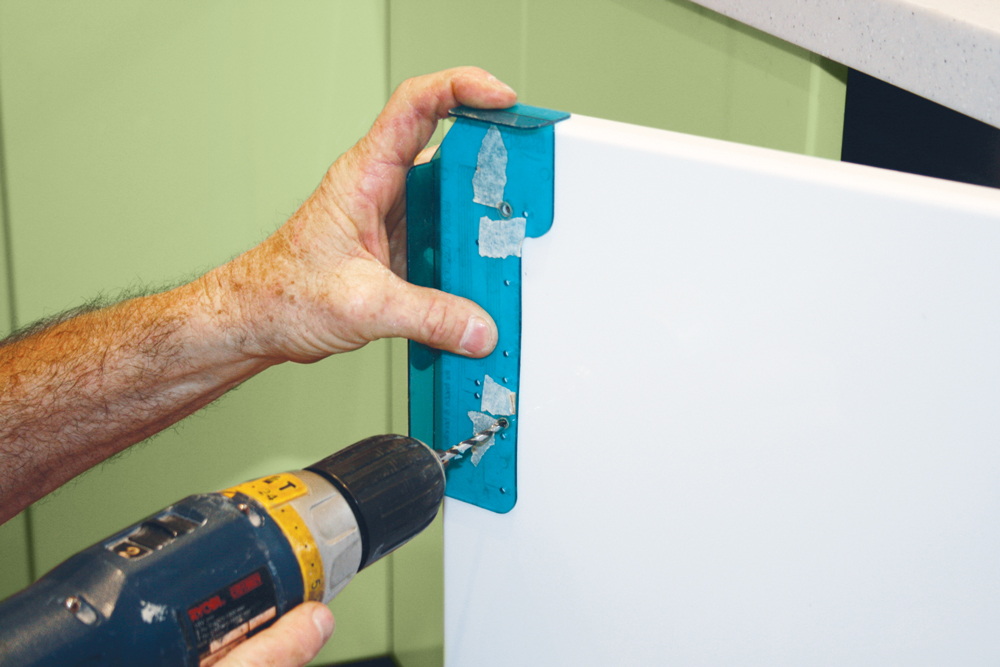 Speed up the job and ensure accuracy with a handle jig
Align the handles
If you have timber-framed cabinet doors, use the top of the base rail as a guide for centring knobs or the lower hole of two-screw handles.
Align the handles with the centreline of the stile to create a good visual balance.
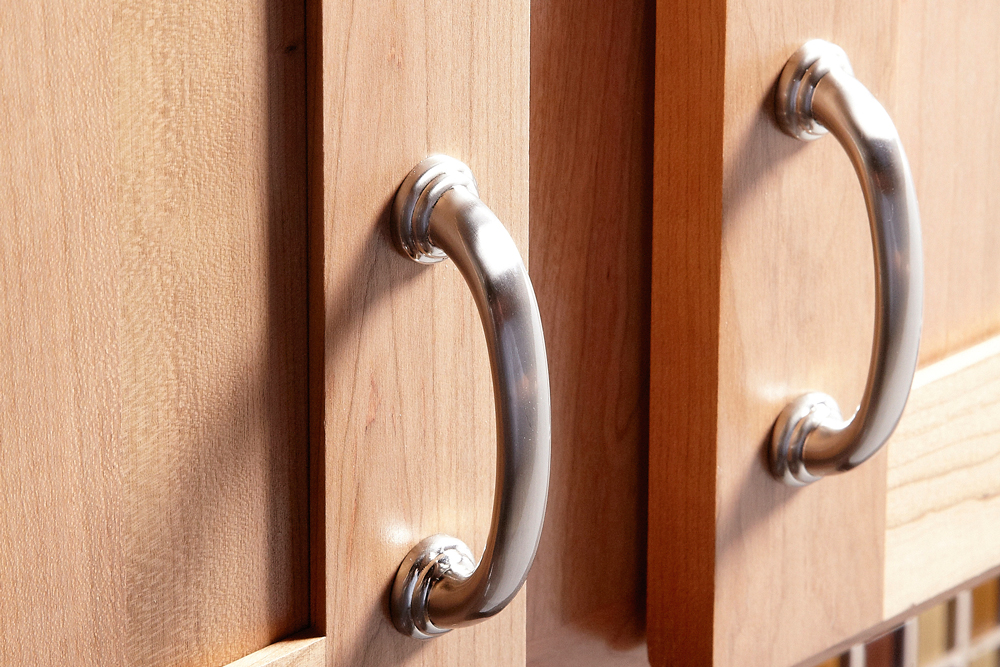 Align the handles with the centreline of the stile to create a good visual balance
Keep the screws tight
The biggest disadvantage of one-screw doorknobs is that they are certain to come loose and start unwinding themselves eventually.
The simple way to prevent this is to use a thread sealant such as Loctite on the machine screws before winding on the knobs.
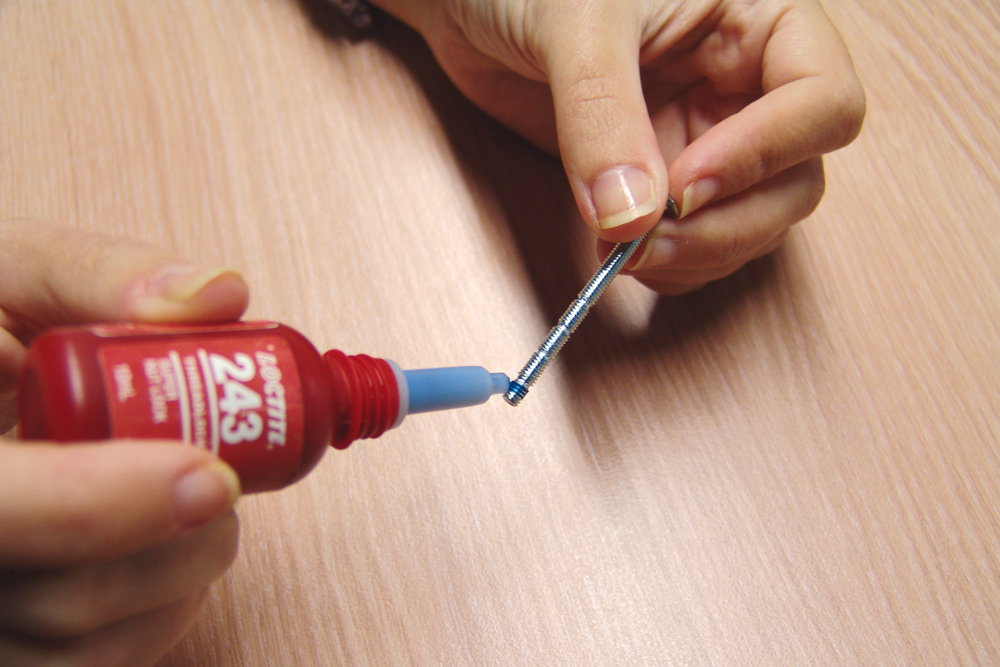 Use a thread sealant such as Loctite on the machine screws before winding on the knobs
Prevent breakout
If you’re having problems with breakout on the back of the cabinet doors no matter what you do, assemble a two-sided jig to slot onto the edge of the door when you drill.
A tight fit is essential, so use a piece of timber for the middle section that is exactly the same thickness as the cabinet door.
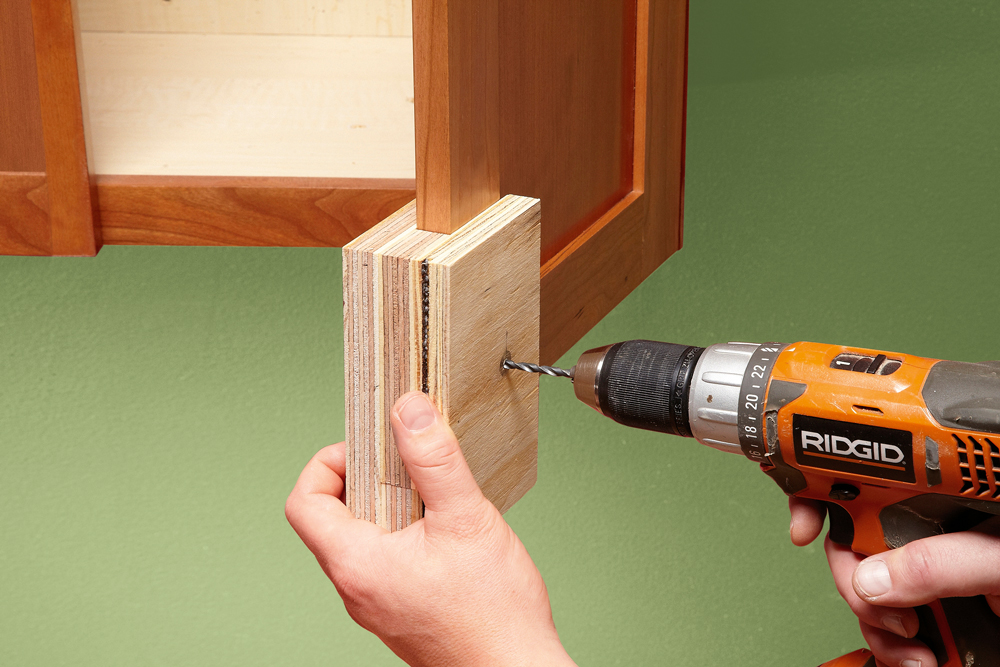
A tight fit is essential, so use a piece of timber for the middle section that is exactly the same thickness as the cabinet door
Fill timber holes
When replacing door handles with new ones of a different size it’s much harder to hide mistakes or fill holes invisibly in timber cabinetry.
To obtain a perfect match, take one of your doors with you to the hardware store and choose three small tubs of tinted putty, one to match the darkest grain, one for the lightest and one that is in between.
Use the colours to mix a custom shade that will render any hole completely invisible when you fill it.
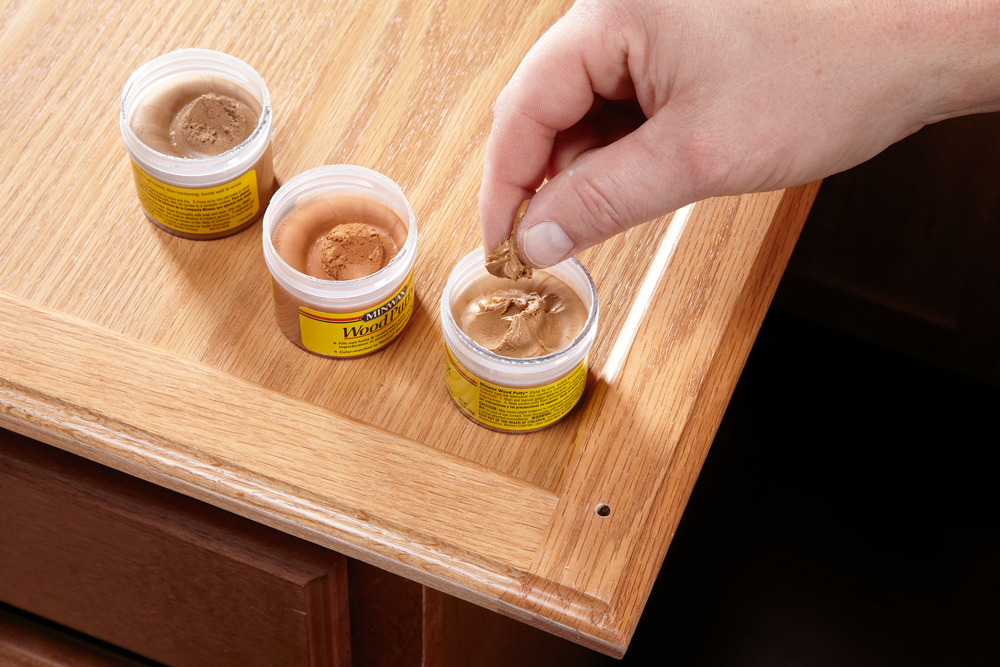
Use the colours to mix a custom shade that will render any hole completely invisible when you fill it
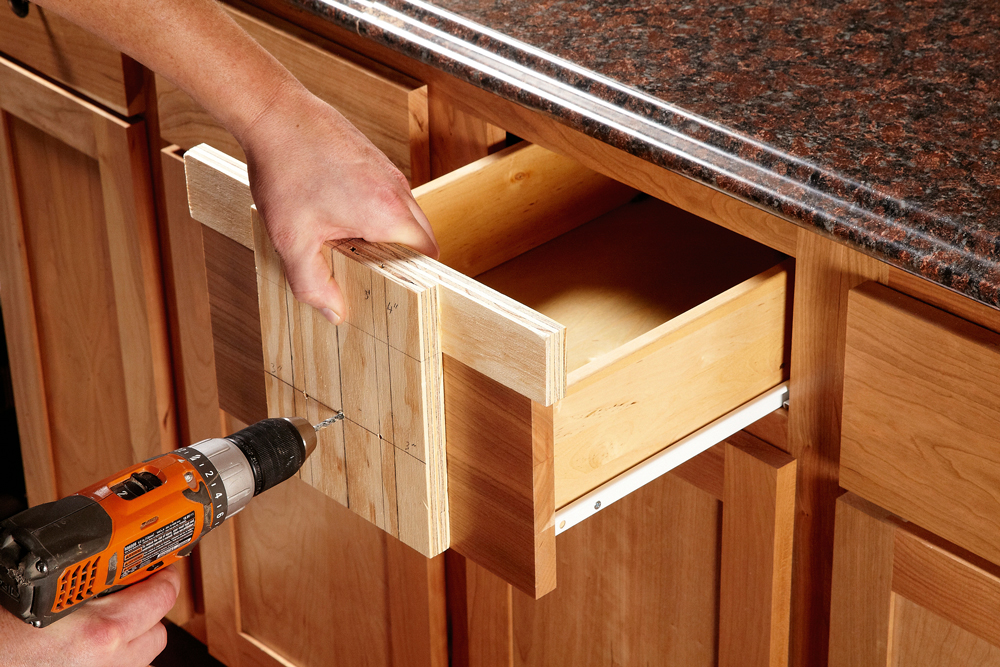
Drawer template
Doorhandle jigs aren’t always the most suitable option for marking holes on drawers.
Drawer faces can often be oversized or require handles in a non-standard location.
For a quick homemade solution, carefully measure and mark hole locations on an offcut of plywood then secure it to a second offcut using adhesive and screws.
Correct for large drawers
The base drawer of a set is often double-height for storing pots and pans or other large kitchenware. Instead of positioning the handle in the centre of the drawer face, secure it the same height from the top as the other handles. It looks more natural and means you won’t have to lean down as far to open the drawer.
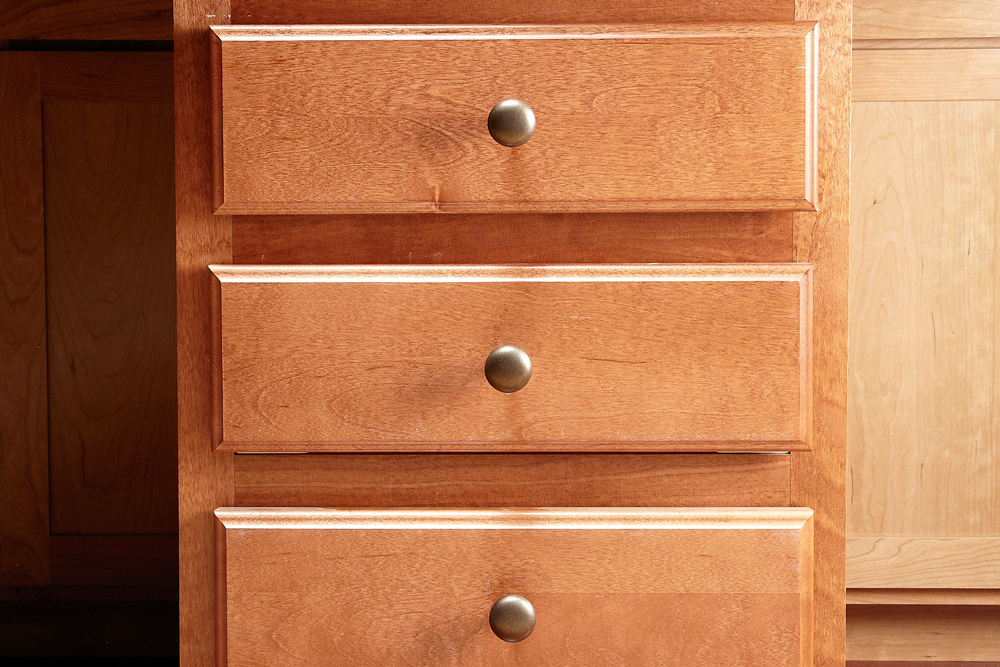
Instead of positioning the handle in the centre of the drawer face, secure it the same height from the top as the other handles
Stop the spin
Thread sealant will keep a knob from unwinding from its screw but, with time and use, it can still turn slightly.
This is not so much of a problem with round knobs, but it can look awful with rectangular or oval ones.
Keep them stationary by adding a dab of super glue to the back before winding in the machine screw.

Keep knobs stationary by adding a dab of super glue to the back before winding in the machine screw