Revamp The Balcony

Upgrade the boards and balustrade, then add a timber screen to overhaul a small deck.
A timber deck is one of the easiest and most cost-effective ways to expand or create an outdoor living space DIY.
Once you’ve added or extended a deck, maintenance is fairly basic, but there does come a time when the boards need more than just their annual cleaning and oiling.
Looking after decking boards will certainly extend their lifespan but timber deteriorates over time, making replacement inevitable.
This job is easier than you may think, even if you’ve never laid decking before. The key is to measure up accurately, then lay the boards systematically, securing them to the existing joists.
Make it new
This neglected elevated deck had become a desolate and unused space.
It was also dangerous because of the condition of the balustrading and several rotten boards. The timber decking and balustrading had to be completely removed and replaced to make the deck safe and usable.
Measure up to buy new decking, allowing for spacing between boards.
If possible, order decking boards long enough to fit the required length without joints. Lengths up to 5.4m are readily available, but boards 6m long can often also be ordered.
For this deck, ACQ treated pine 5400 x 90 x 22mm decking boards, about $13 each, were used, and finished with exterior oil in a natural tone.
The new balustrade was built by securing 2400 x 900mm black fence panels to the timber posts. The Flat Top Protector Aluminium panels cost $59 each.
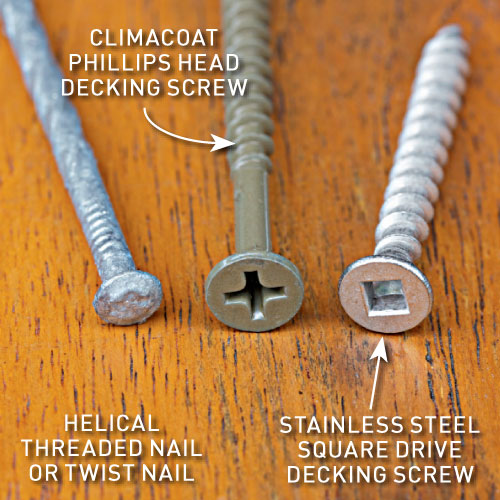
Decking fasteners
Timber decking boards are secured using galvanised or stainless steel screws or nails.
For ACQ treated decking, it’s critical you use ACQ rated nails or screws. This is because ACQ timber corrodes conventional fasteners more quickly than regular treated pine or hardwood.
TIP Drill pilot holes for fasteners in hardwood decking or joists.
Timber decking boards are secured using galvanised or stainless steel screws or nails
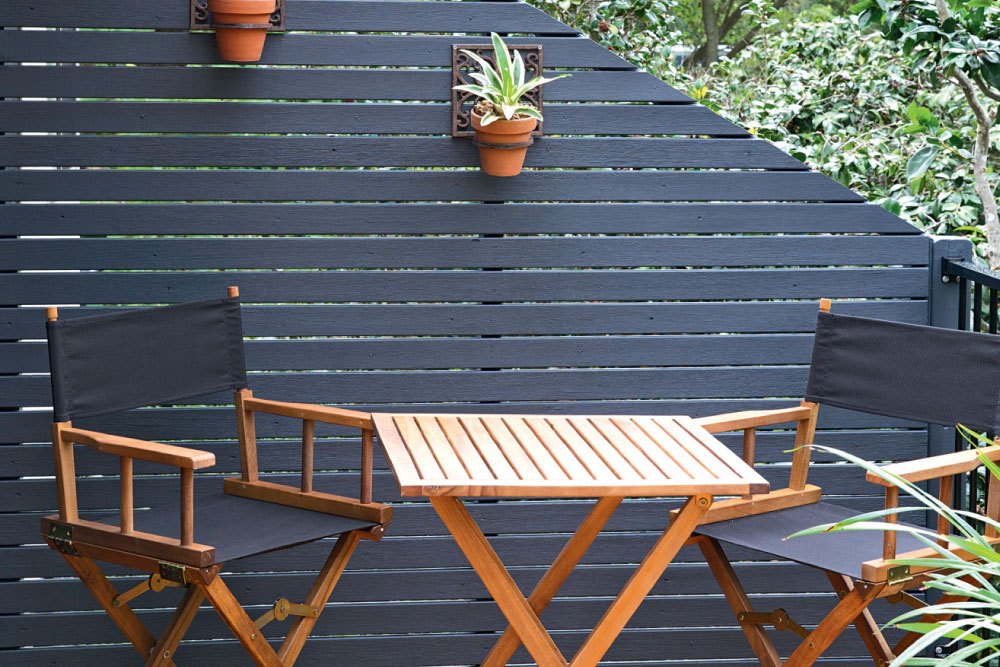
Installing a privacy screen
One end of this deck lacked privacy, so a screen was built.
A frame was made from 90 x 45mm treated pine, then the slats were attached using a cordless brad nailer.
For the slats, salvaged timber from the old deck was cleaned and cut down to size.
To install this type of screen, it’s faster and easier to paint the slats before attaching them to the frame.
It’s important on elevated balconies that the slats are spaced a maximum of 5mm apart, so kids can’t get their fingers or toes in the gaps, then climb the screen.
One end of this deck lacked privacy, so a screen was built
Lay new decking


