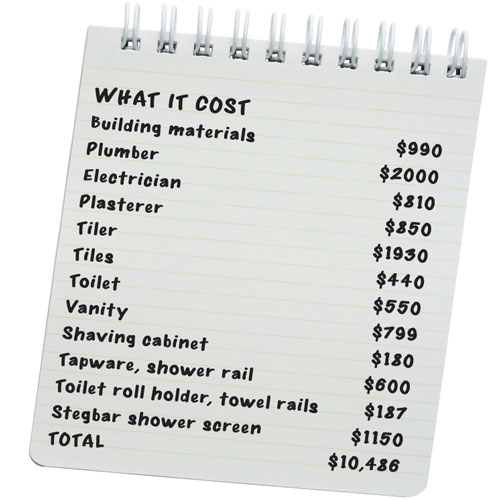
My $10,000 Ensuite
Sandra Bridekirk had always wanted a bedroom with ensuite but none of the rooms in her two-level T-shaped house fitted the bill.
The closest was the rumpus room, in which the previous owners had installed a spa bath next to a bar area with a sink, cabinets and tiled floor.
As the plumbing was already there and the spa wasn’t used, Sandra decided to build an L-shaped ensuite in one corner and remodel the rest of the space as a master bedroom.
Preparing the area
The spa tub was in mint condition and Sandra had the paperwork so she Googled the style and found it was a current model that retailed for $3500.
She listed it on eBay, selling it for $950 to a builder who also helped remove it from its timber frame.
Access under the floor was good as the room is above the garage, so they cut off the outlet pipe, capped the water pipes and removed the pump.
The adjacent sink was also removed but the pipes left for later use.
Laying the foundations
The tiles and the particleboard flooring were removed and an interior moisture-proof structural floor product called Scyon Secura from James Hardie was installed.
An existing Velux roof window was removed and reinstalled further down the sloping roof to add light and make way for the new bathroom wall, which was built using 70 x 45mm pine with a gap for a space-saving sliding timber door.
The sloping ceiling and walls of the entire room are finished with V-joint pine lining boards, so these were removed from the bathroom area and a new Gyprock ceiling installed.
Installing new pipes
The plumber came to install the PVC piping under the floor for the shower, vanity, toilet and floor waste.
He also put in hot and cold copper piping for the shower and vanity, and copper piping for the toilet.
An old toilet in the adjacent laundry had previously been removed so the PVC piping was simply connected to the old earthenware pipes
beneath the laundry.
‘We decided to install a 900mm mirrored shaving cabinet above the vanity for storage and to make the room look larger,’ says Sandra.
‘Recessing it would make it appear less bulky so the wall was framed up and the carcass recessed into the wall
and screwed into the studs.’
An electrician came and roughed in wiring for lights and power, the cavity door unit was hung and PVC angle added around the perimeter.
The plasterer returned to line the external bathroom wall with Gyprock and the internal walls with Villaboard.
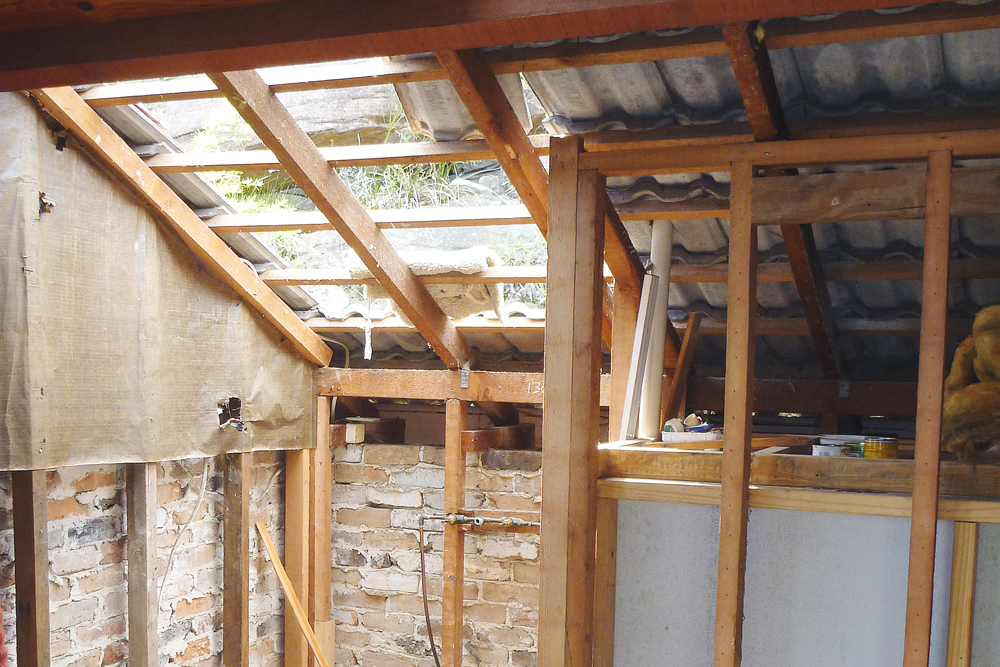
The wall and floor were stripped and a window added to the space
Making it watertight
The messy job of waterproofing was done by Sandra’s builder dad, Allan, who applied three coats of membrane to the floor and 200mm up the walls, and all the surfaces in the shower.
After the first coat, fibreglass matting membrane was also applied to the shower area.
Strips of aluminium angle were installed across the door entry and where the shower screen was to go.
A tiler then rendered the floor
and after seven days of curing two more coats of waterproof membrane were applied to the floor and a further three to the entire shower recess.
Fitting the tiles
‘The first thing we bought were the tiles, which really determine the look of a bathroom,’ says Sandra.
‘We went to Impressa Tile Gallery in Brookvale, NSW, and bought some end-of-line tiles on sale.
‘With only a small space to cover, we saved a fortune on 85 x 85mm stone-look ceramic mosaic floor tiles and beautiful 300 x 572mm wall
tiles from South America.
‘The shop was short on stock of these so we decided to create a deep blue feature wall from 300 x 300mm floor tiles in the same range.’
To fit the dimensions of the
900 x 1000mm shower recess and create an illusion of space the wall tiles were laid vertically.
When the floor tiles were safe to walk on the electrician fitted a small, low-noise ducted exhaust fan and energy-saving LED downlights.
The final touches
With the tiling and electricals done, the ceiling and trim were painted with a white semi gloss acrylic.
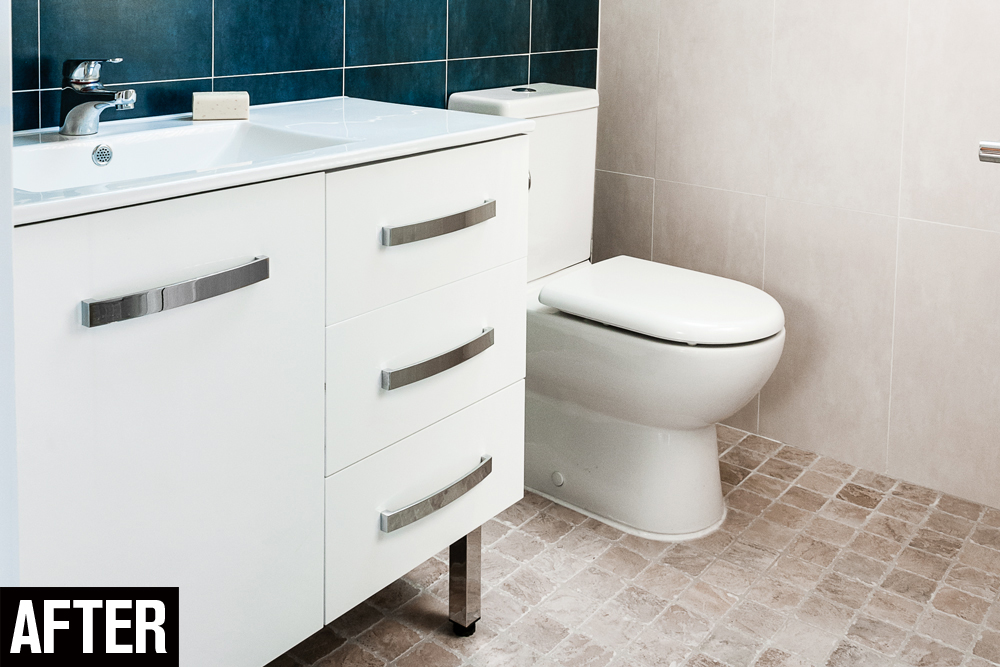
The plumber came back and installed the new vanity, toilet and showerhead.
Tradies had earlier come to measure and quote on the frameless glass shower screen so they returned to install it.
Sandra had ordered three glass shelves for storage in the shower.
They were positioned in a corner with chocks of timber taped up to support the shelves while the silicone set.
Fitting the towel rails and toilet roll holder was the last job.
The rails were cut to size with a hacksaw then secured to the wall with screws, and the toilet roll holder was attached to one side of the vanity, concealing it from view.
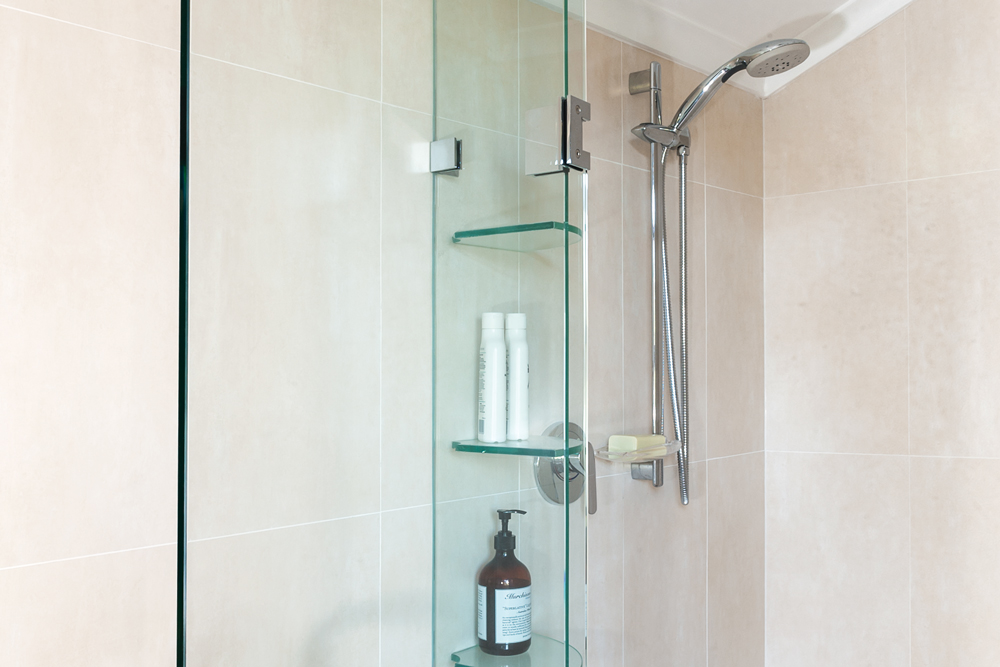 A shower with a frameless glass door was installed in the alcove


