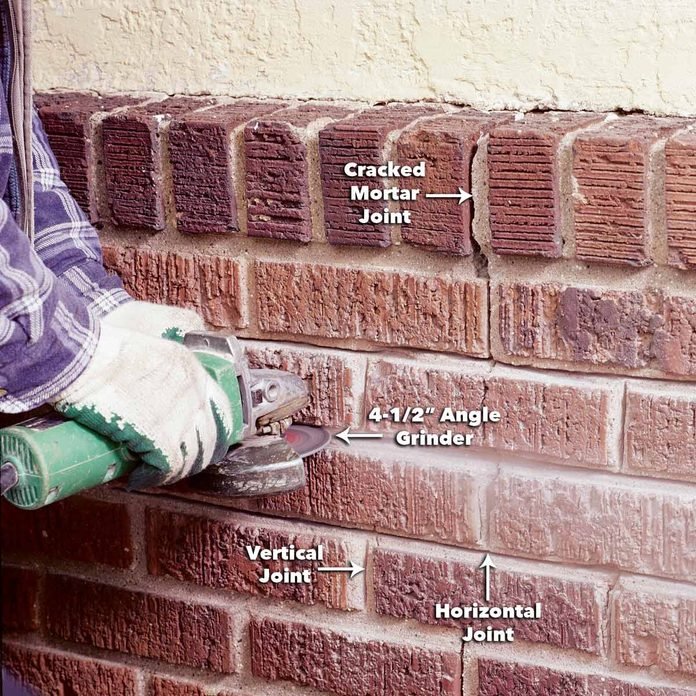
Brick is one of the most prized exteriors for homes because it’s attractive and easy to maintain. Yet over the years, water, heat and seasonal expansion and contraction all attack the solid mass of a brick wall at its most elastic (and weakest) point: the mortar joints.
Mortar joints deteriorate wherever water can soak them – under windows and walls, around chimneys, behind downpipes, at ground level and at any exposed wall top.
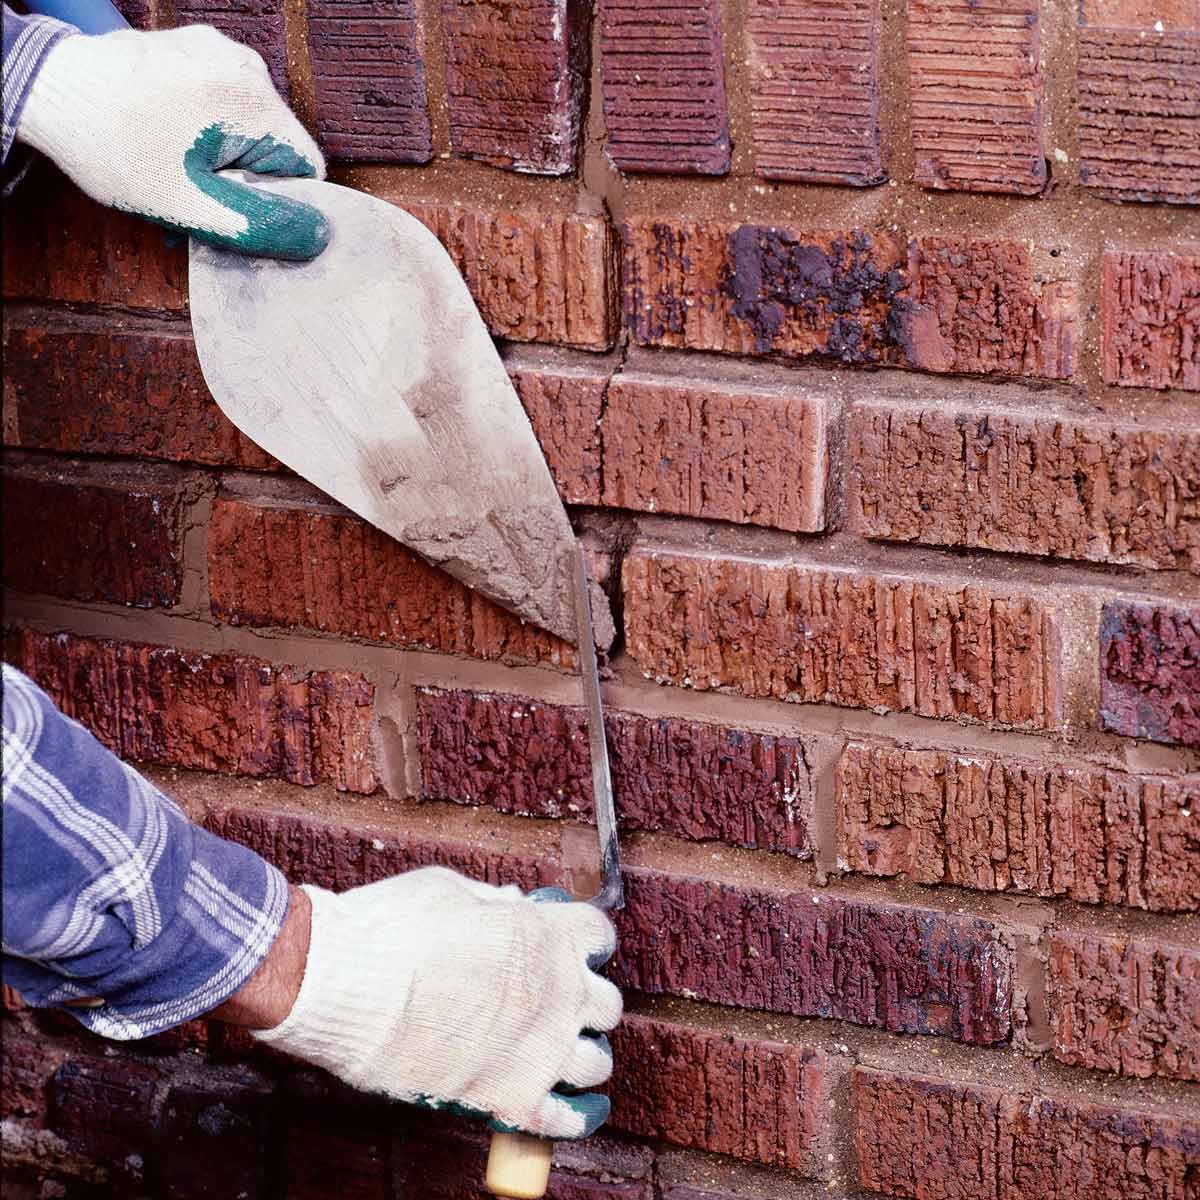
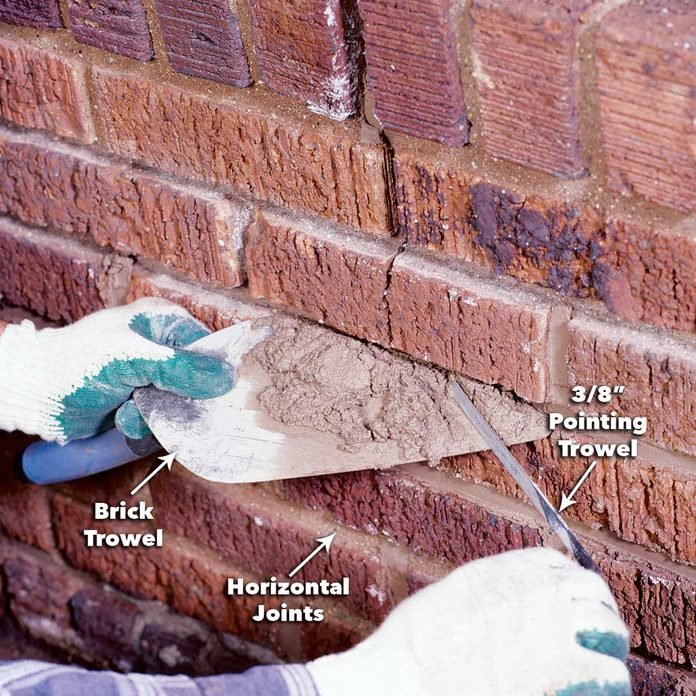
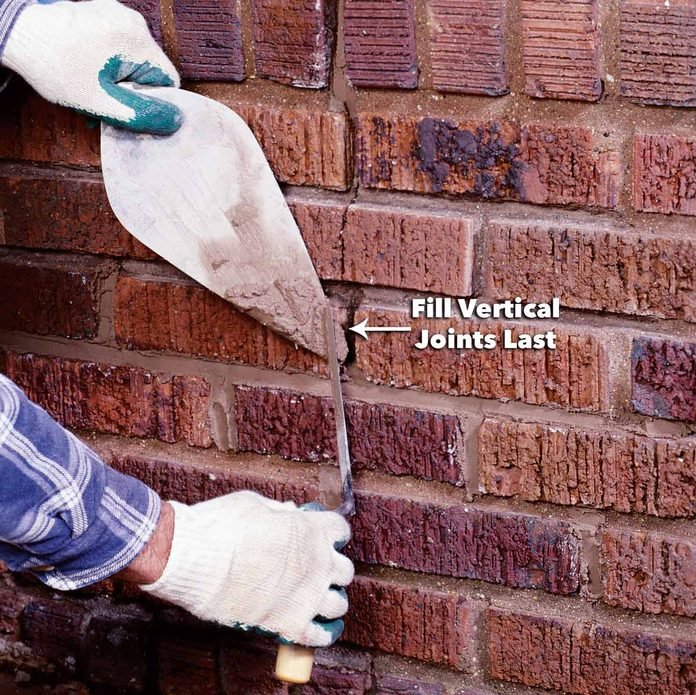
Repairing eroding and cracked mortar joints is called pointing, repointing or tuckpointing. We’ll show you the proper tools and techniques to repair and restore cracked and worn-away mortar joints to make them solid, durable and good looking. To keep them that way for the long run, you have to stop water from getting into your bricks and foundation.
Repointing brick is slow, painstaking work that requires few special skills but a lot of patience. Using the steps we show, you can expect to repoint about two square metres. of brick work a day. However, if you rush and do careless work on a highly visible area, the repointing brickwork will stick out like graffiti. Brick is durable; bad results will bother you for a long time! If you don’t have repointing brick experience, consider hiring a pro for:
Larger-scale pointing jobs, such as a whole wall that needs repair.
Chimney and wall repair requiring setting up and moving scaffolding.
Areas with a lot of loose or missing brick requiring rebuilding walls or corners.
Colour-matching new mortar to existing mortar in highly visible areas.
Read on to learn how to repoint brick.
Tools Required
Angle grinder
Dust mask
Flat chisel
Hammer
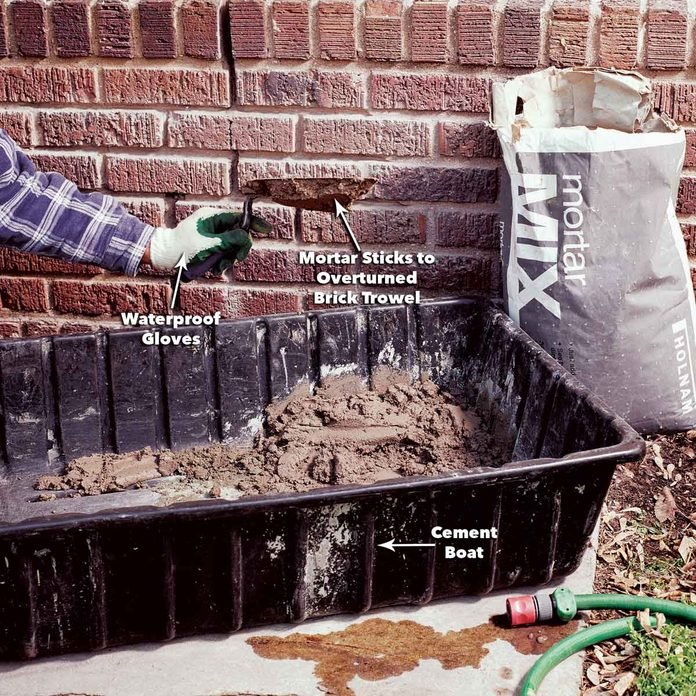
Rubber gloves
Safety glasses
Trowel
Tuckpointing tool
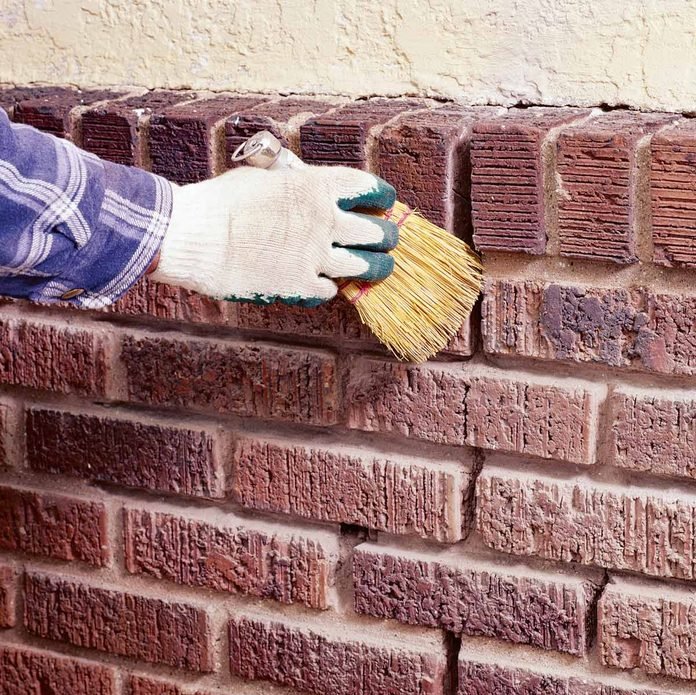
Whisk broom
Materials Required
Mortar mix