Step 6: Backset stones

Step 6: Backset stones
FAMILY HANDYMAN
  • Backset each row about 12mm from the course below.
  • Break up courses with thick “jumper” stones to create a random pattern.

Once the base course is installed, lay the remaining courses, except the capstone. Offset joints between courses to give the walls greater strength and to achieve a more pleasing look. Mix stone height, length and colour as you lay the stones. Place exceptionally thick stones (called “jumpers”) where you want to break up a uniform pattern. Backset each course about 12mm inside the previous course so the wall slopes slightly inward.

The toughest part of building the planter is laying the stones in an attractive, yet seemingly random, pattern. We often set a stone in place, then moved it several times to find the best fit. Grab stones from different piles (except the capstone pile) for each course to ensure a mix of lengths and thicknesses. Take your time and don’t hesitate to take a section of wall apart to redo it if it doesn’t look good.

Advertisement

Step 7: Backfill gradually

Step 7: Backfill gradually
FAMILY HANDYMAN
  • As you complete every couple of courses, pull the landscape fabric tight against the stones and shovel backfill (topsoil) against the walls.
  • Backfill to the top of the last installed row. This helps hold the stones in place.

Discover 5 ways to enrich garden soil.

Step 8: Level the last course and dry-fit the capstones

Step 8: Level the last course and dry-fit the capstones
FAMILY HANDYMAN
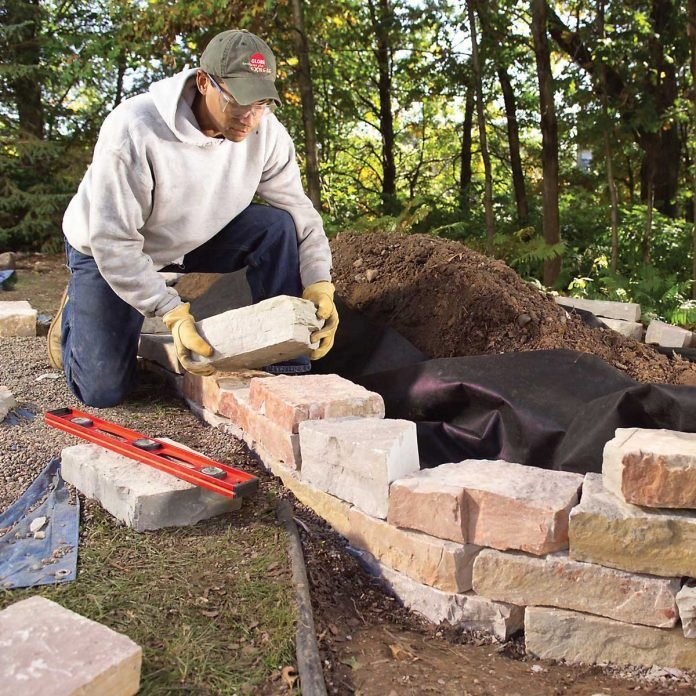
  • Set capstones in place, overhanging the other courses by 50mm.
  • Mark the stones and cut them to create tight joints.
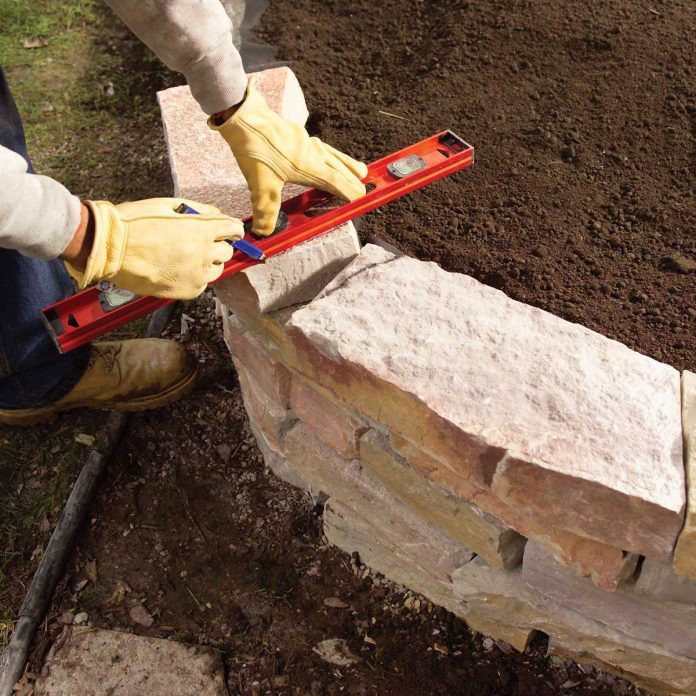
  • Place a straight 3m 2×4 over the last course as you lay the final course to check for level.
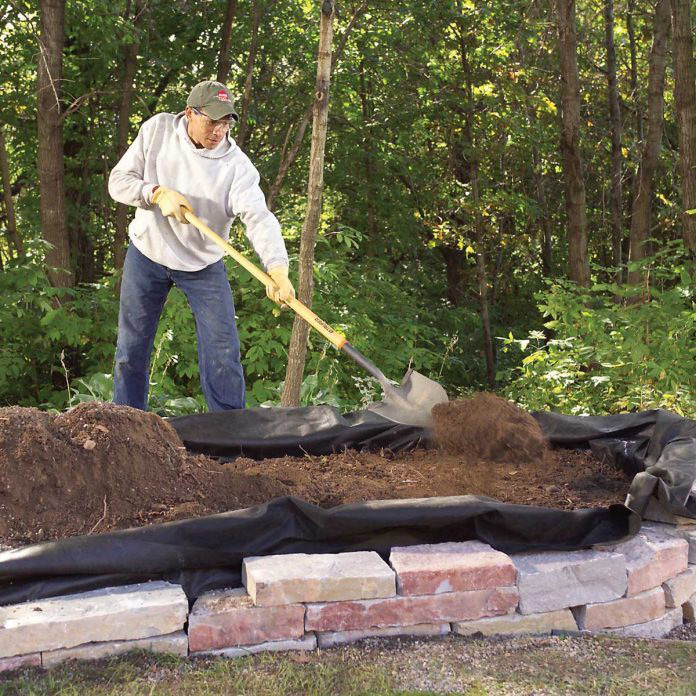
  • Now use a utility knife to trim the landscape fabric, making it cover the last course of stone by about 100mm.
  • Then install the capstones so they slightly overhang the underlying courses. We made ours overhang 50mm.
  • Leave gaps at least 6mm wide between capstones so you can tuck mortar between them. But avoid gaps more than 20mm wide because they’ll look bad.
  • To cut them to fit, place the first two capstones on the wall.
  • Use a straightedge to mark roughly parallel lines on both stones so the edges will match. You don’t have to make this cut perfect; mortar will fill the gap between them.
  • After you cut them to size, set them in place.

When you’re laying the final course, patiently select and place stones so the top of the entire course is flat and level (the stones should be within 6mm of level with adjacent stones). That way, you can more easily lay your capstone flat and level.

If two capstones fit nicely along the outside edge but leave a large gap on the inside, fill the gap with a wedge of stone (cut to fit if necessary) rather than cutting off large sections of capstone. If the gap-filling stones aren’t as thick as the capstone, make up the difference by piling more mortar beneath them.

Setting capstone is a time-consuming process, since you have to mark, cut and dry-lay them one at a time. The positions of the capstones will change slightly after cutting, so mark and fit them one at a time all along the wall.

Step 9: Mortar the capstones in place

Step 9: Mortar the capstones in place
Family Handyman
  • Remove a few capstones at a time and lay a 12mm-thick bed of mortar over the back half of the wall.
  • Fold the fabric over the mortar.
  • Add another 12mm of mortar, then set the capstones in place.
  • Work in sections of two or three capstones at a time so the mortar doesn’t dry out on the wall. Mortar and set the entire course of capstone.

Mix one bag of mortar with water in a wheelbarrow until it’s the consistency of peanut butter, then put some in a 20-litre bucket. Like any cement-based product, mortar can burn your skin, so wear gloves.

How to build a concrete planter wall.

Step 10: Fill the joints

Step 10: Fill the joints
  • Pack mortar into the joints on the top and front of the capstones. Scoop the mortar onto one trowel, and use a second trowel to push the mortar into the joints, slightly overfilling them.
  • Let the mortar dry, then use a whisk broom or a wire brush to brush away any that has splashed onto the stones. If you discover stains later, scrub them away with a diluted mix of muriatic acid.
  • Allow the mortar to set overnight before topping off the planter with soil and mulch. Then fill it with the flowers of your choice.

Sign up here to have Handyman’s favourite stories straight to your inbox.

Source: Family Handyman

Sign up for emails