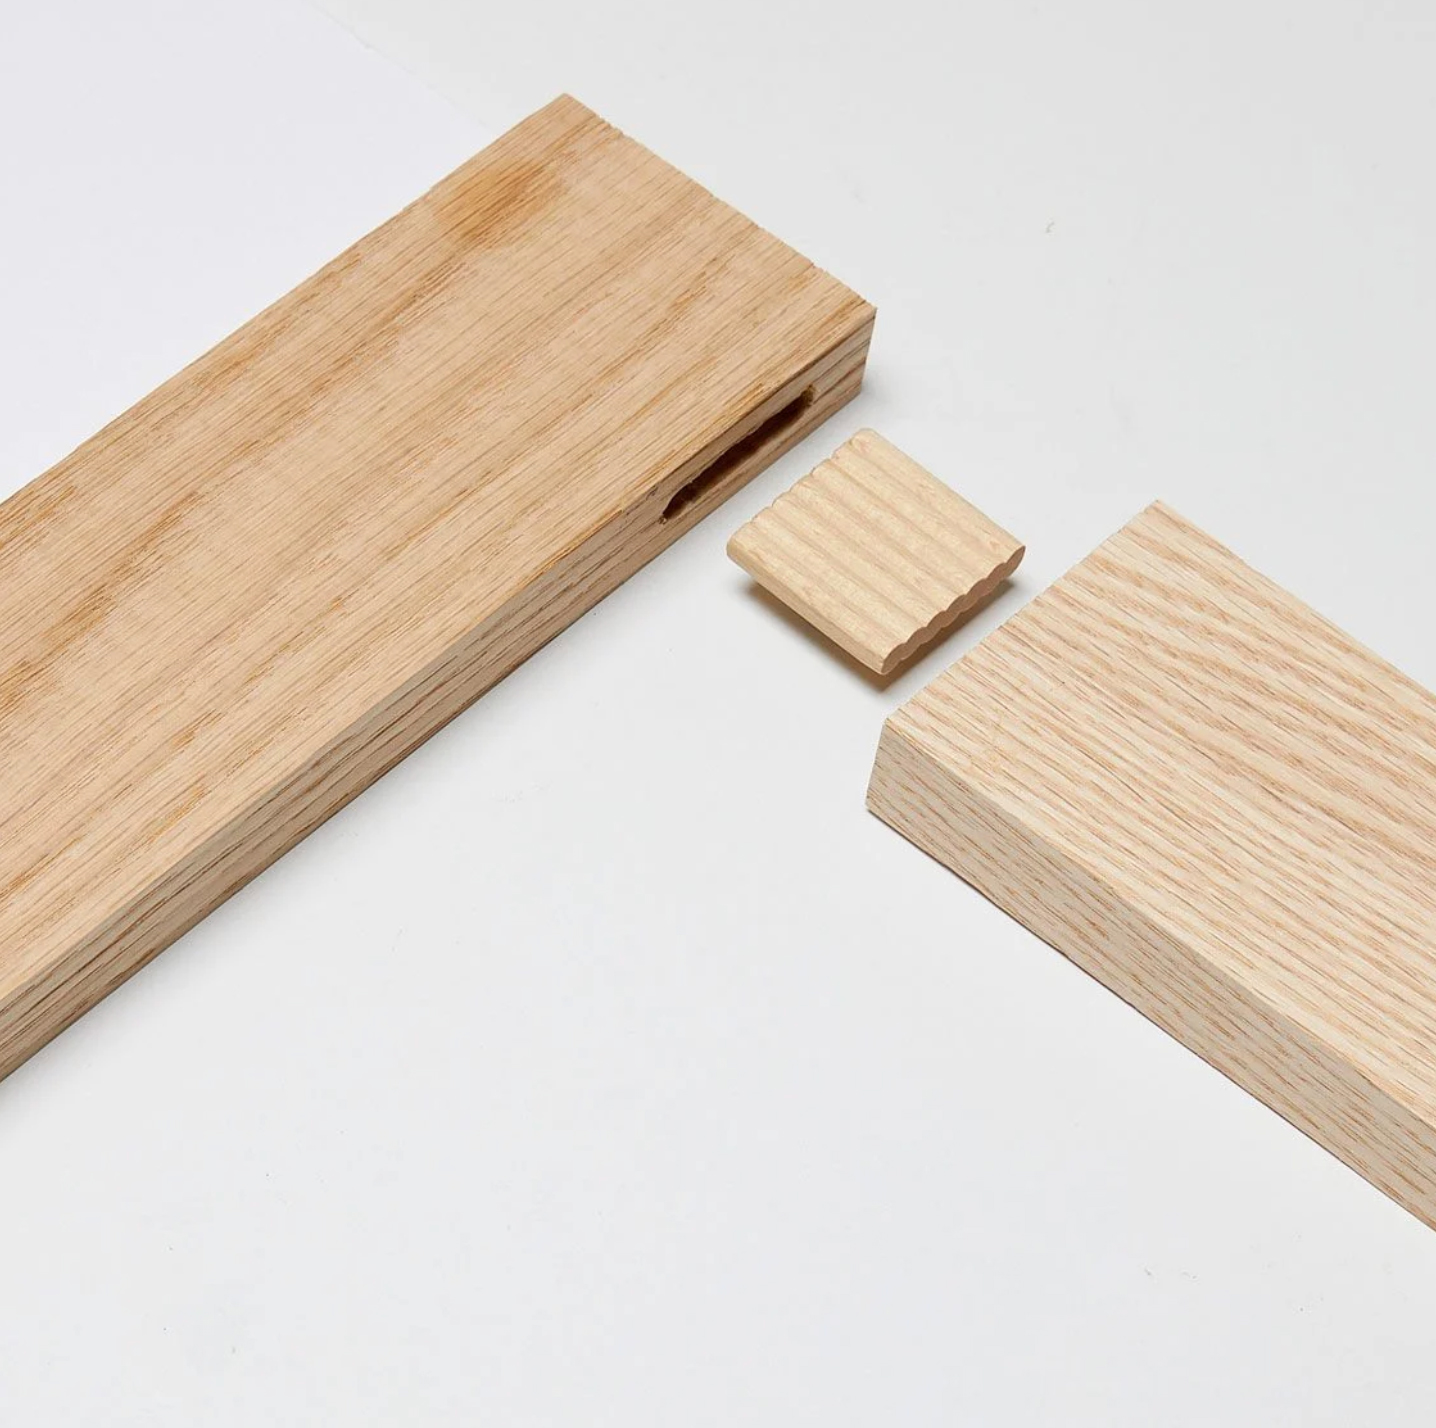
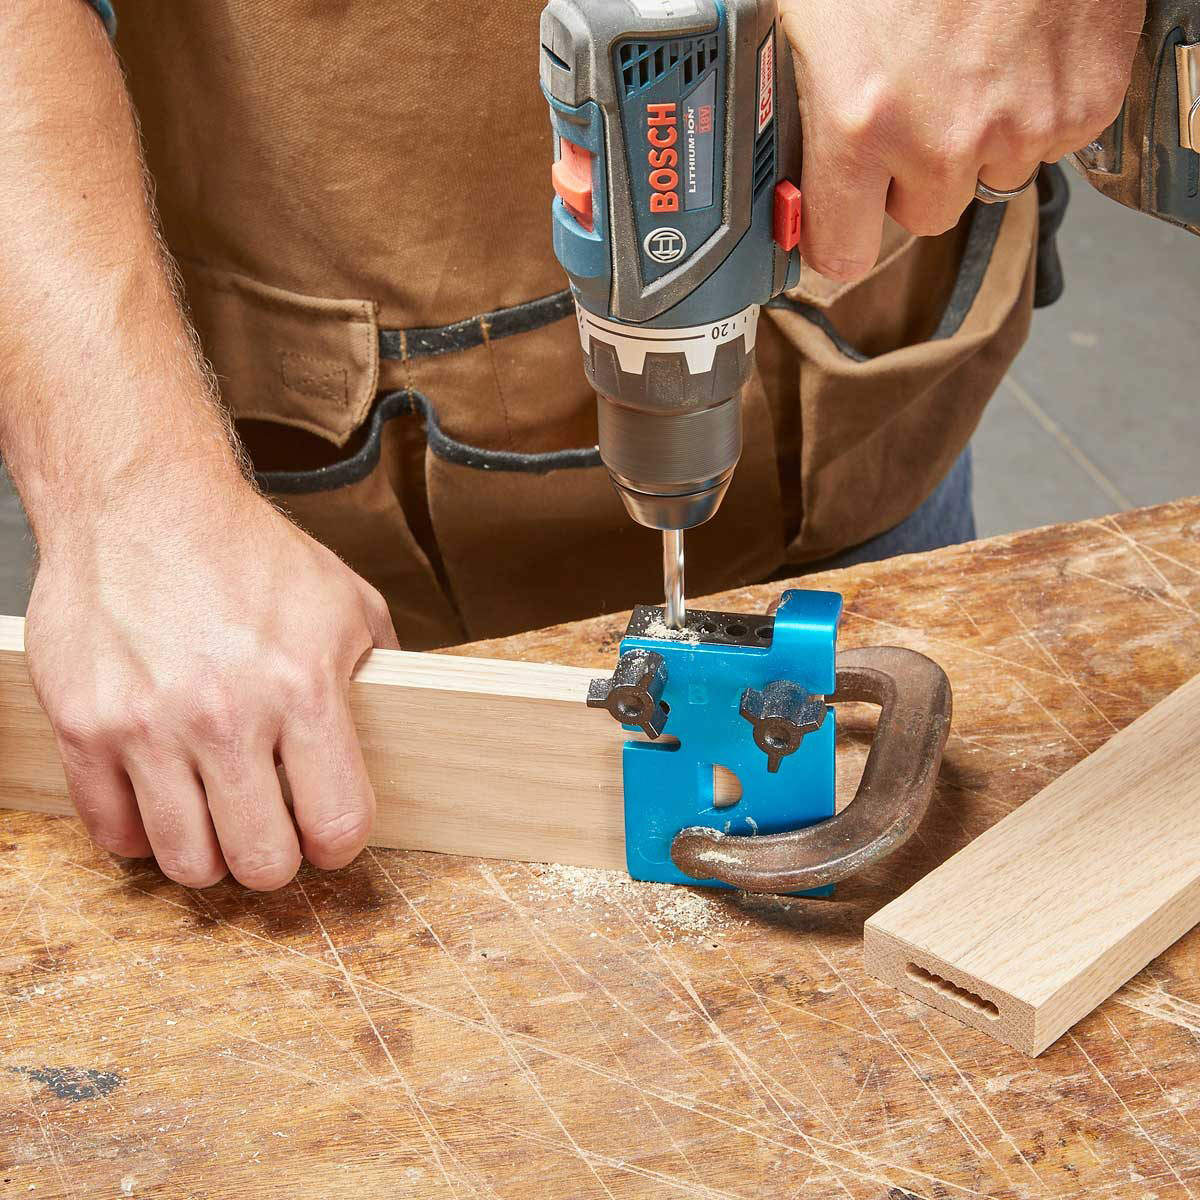
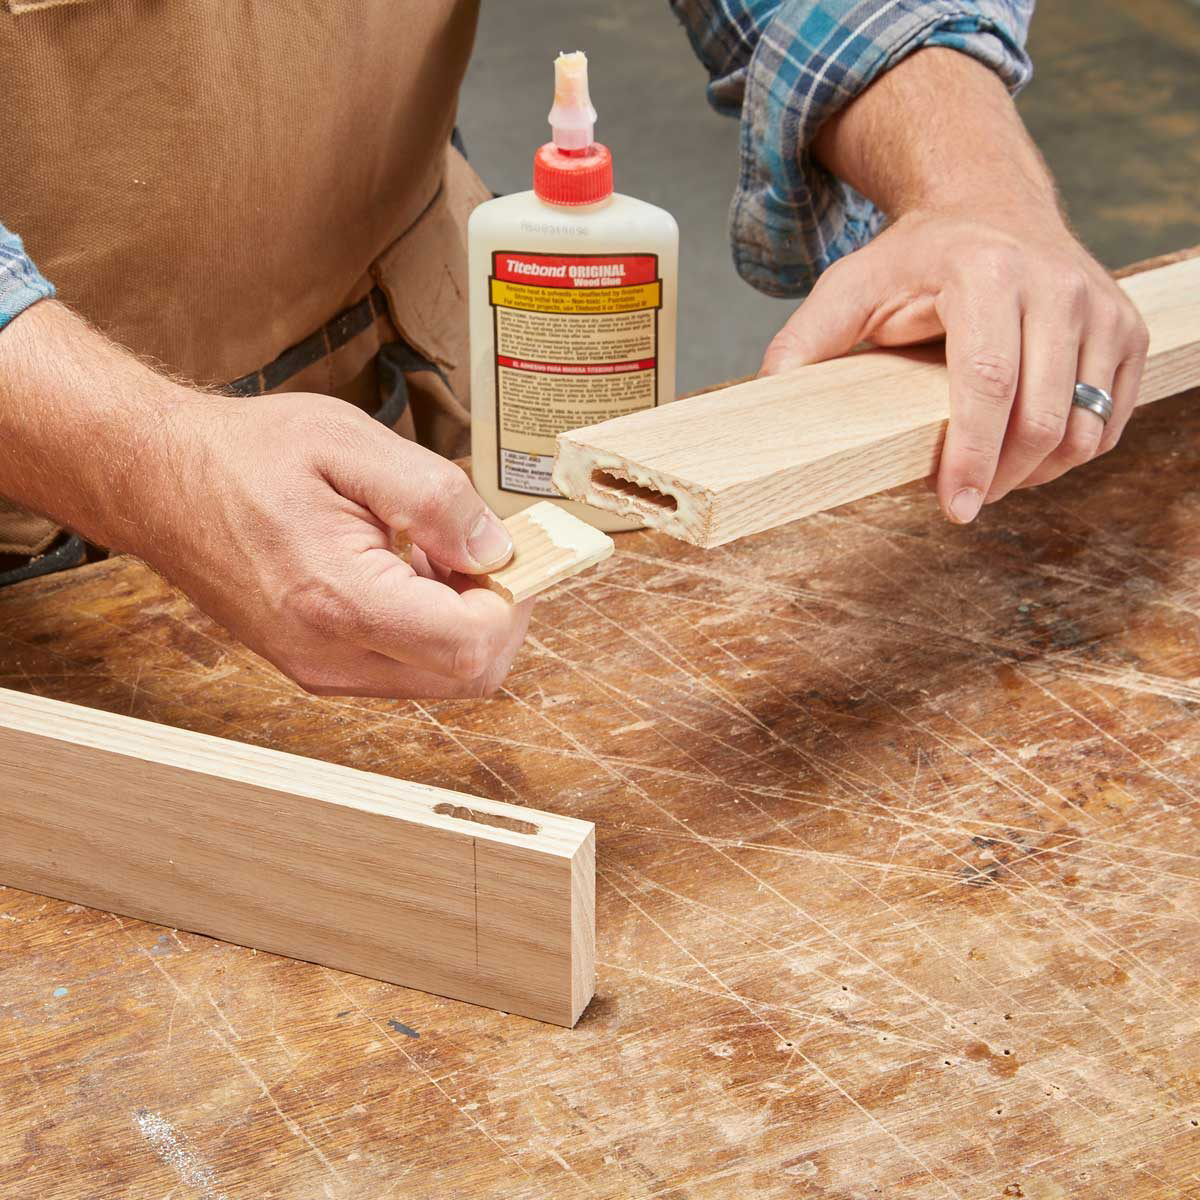
A BeadLock jig facilitates drilling mortises in adjoining parts, again using only a drill. The basic kit is around $90. This is one of many “loose tenon” systems. Instead of the tenon being cut from one of the adjoining parts, precut tenon stock is glued into a mortise in both parts. BeadLock mortises are just a series of overlapping holes, and the tenon stock looks like a stack of dowels. You can buy tenon stock, or you can buy router bits to make your own tenon stock as needed. But you’ll need a router table for that, and it’s a bit fussy.
Pros
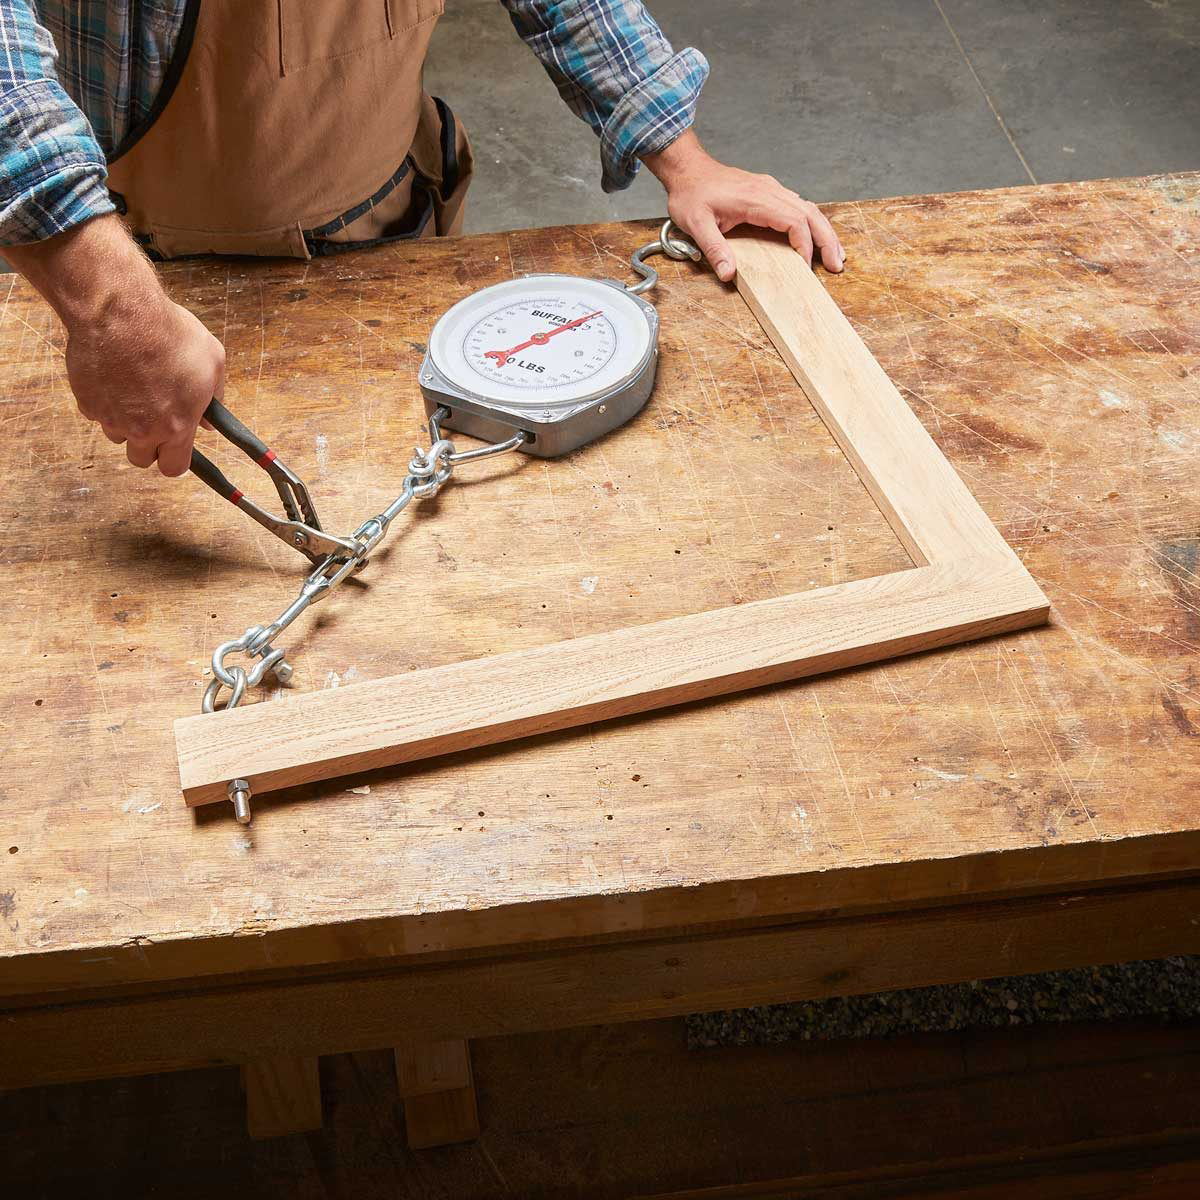
Easy to use
Positive alignment in both directions
Cons
Slow
Requires clamping
Sawdust sticks in the holes
Jig is not self clamping