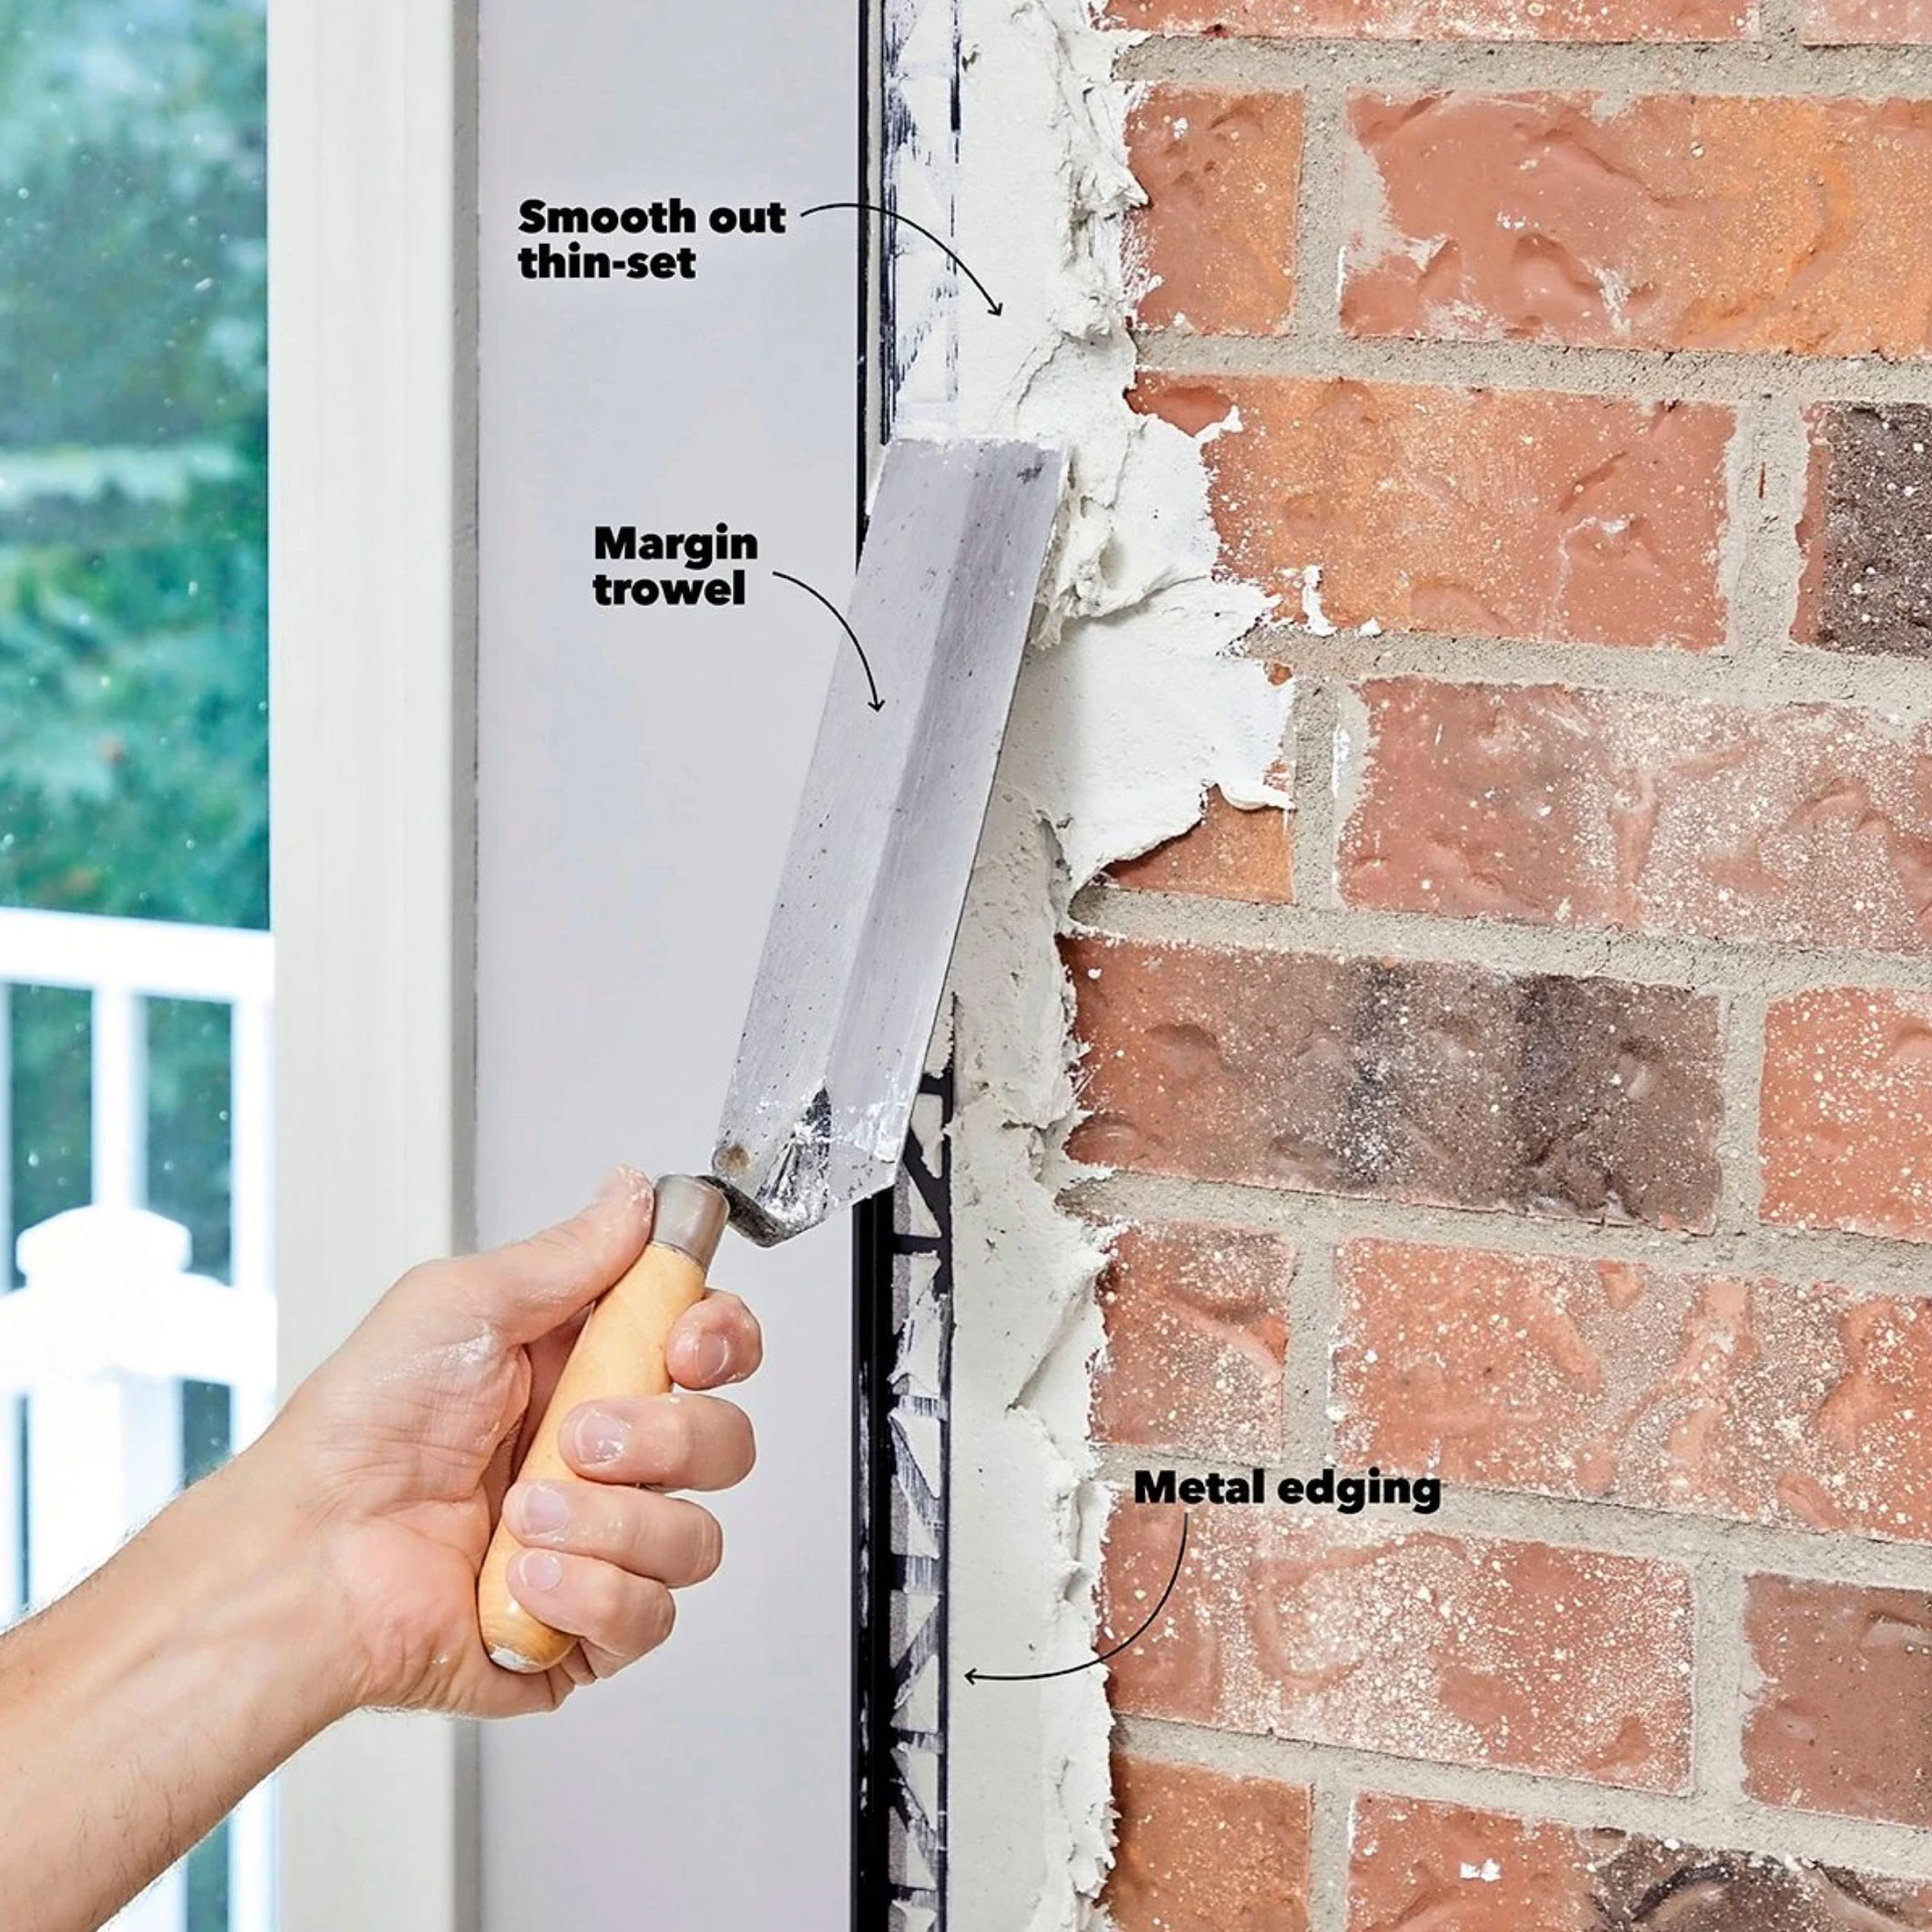
Step 10: Embed the edging
Advertisement
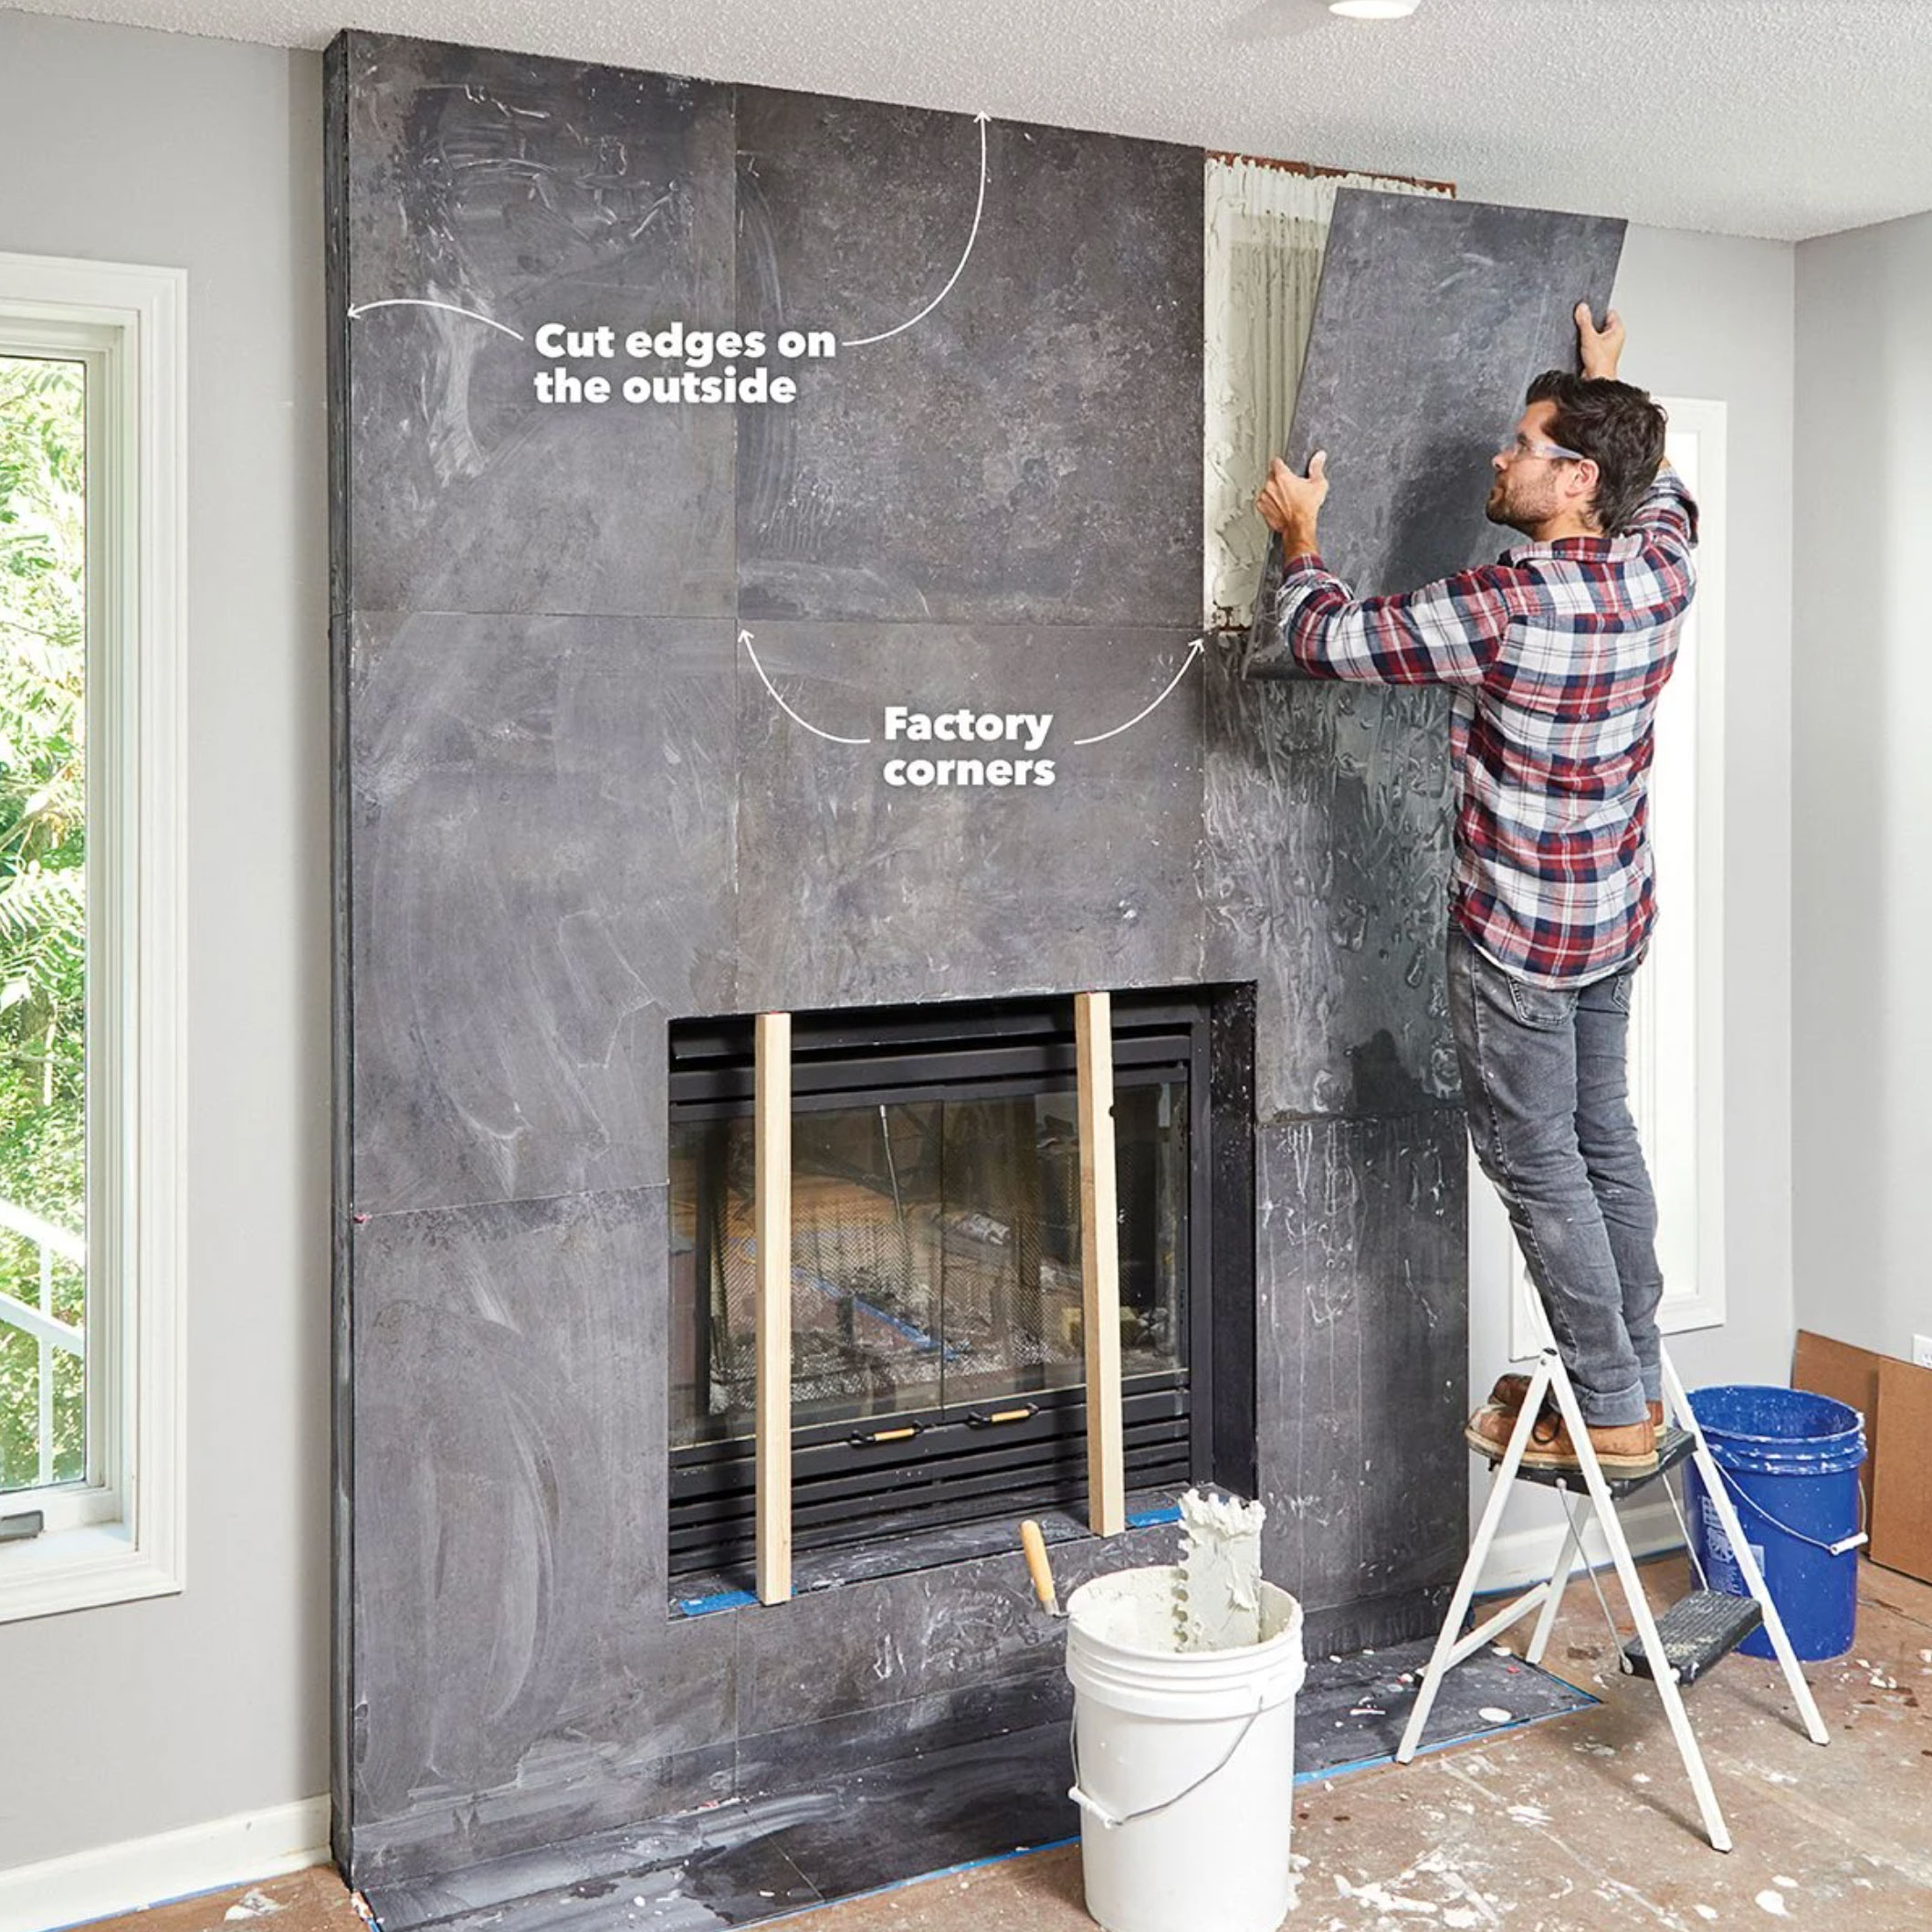
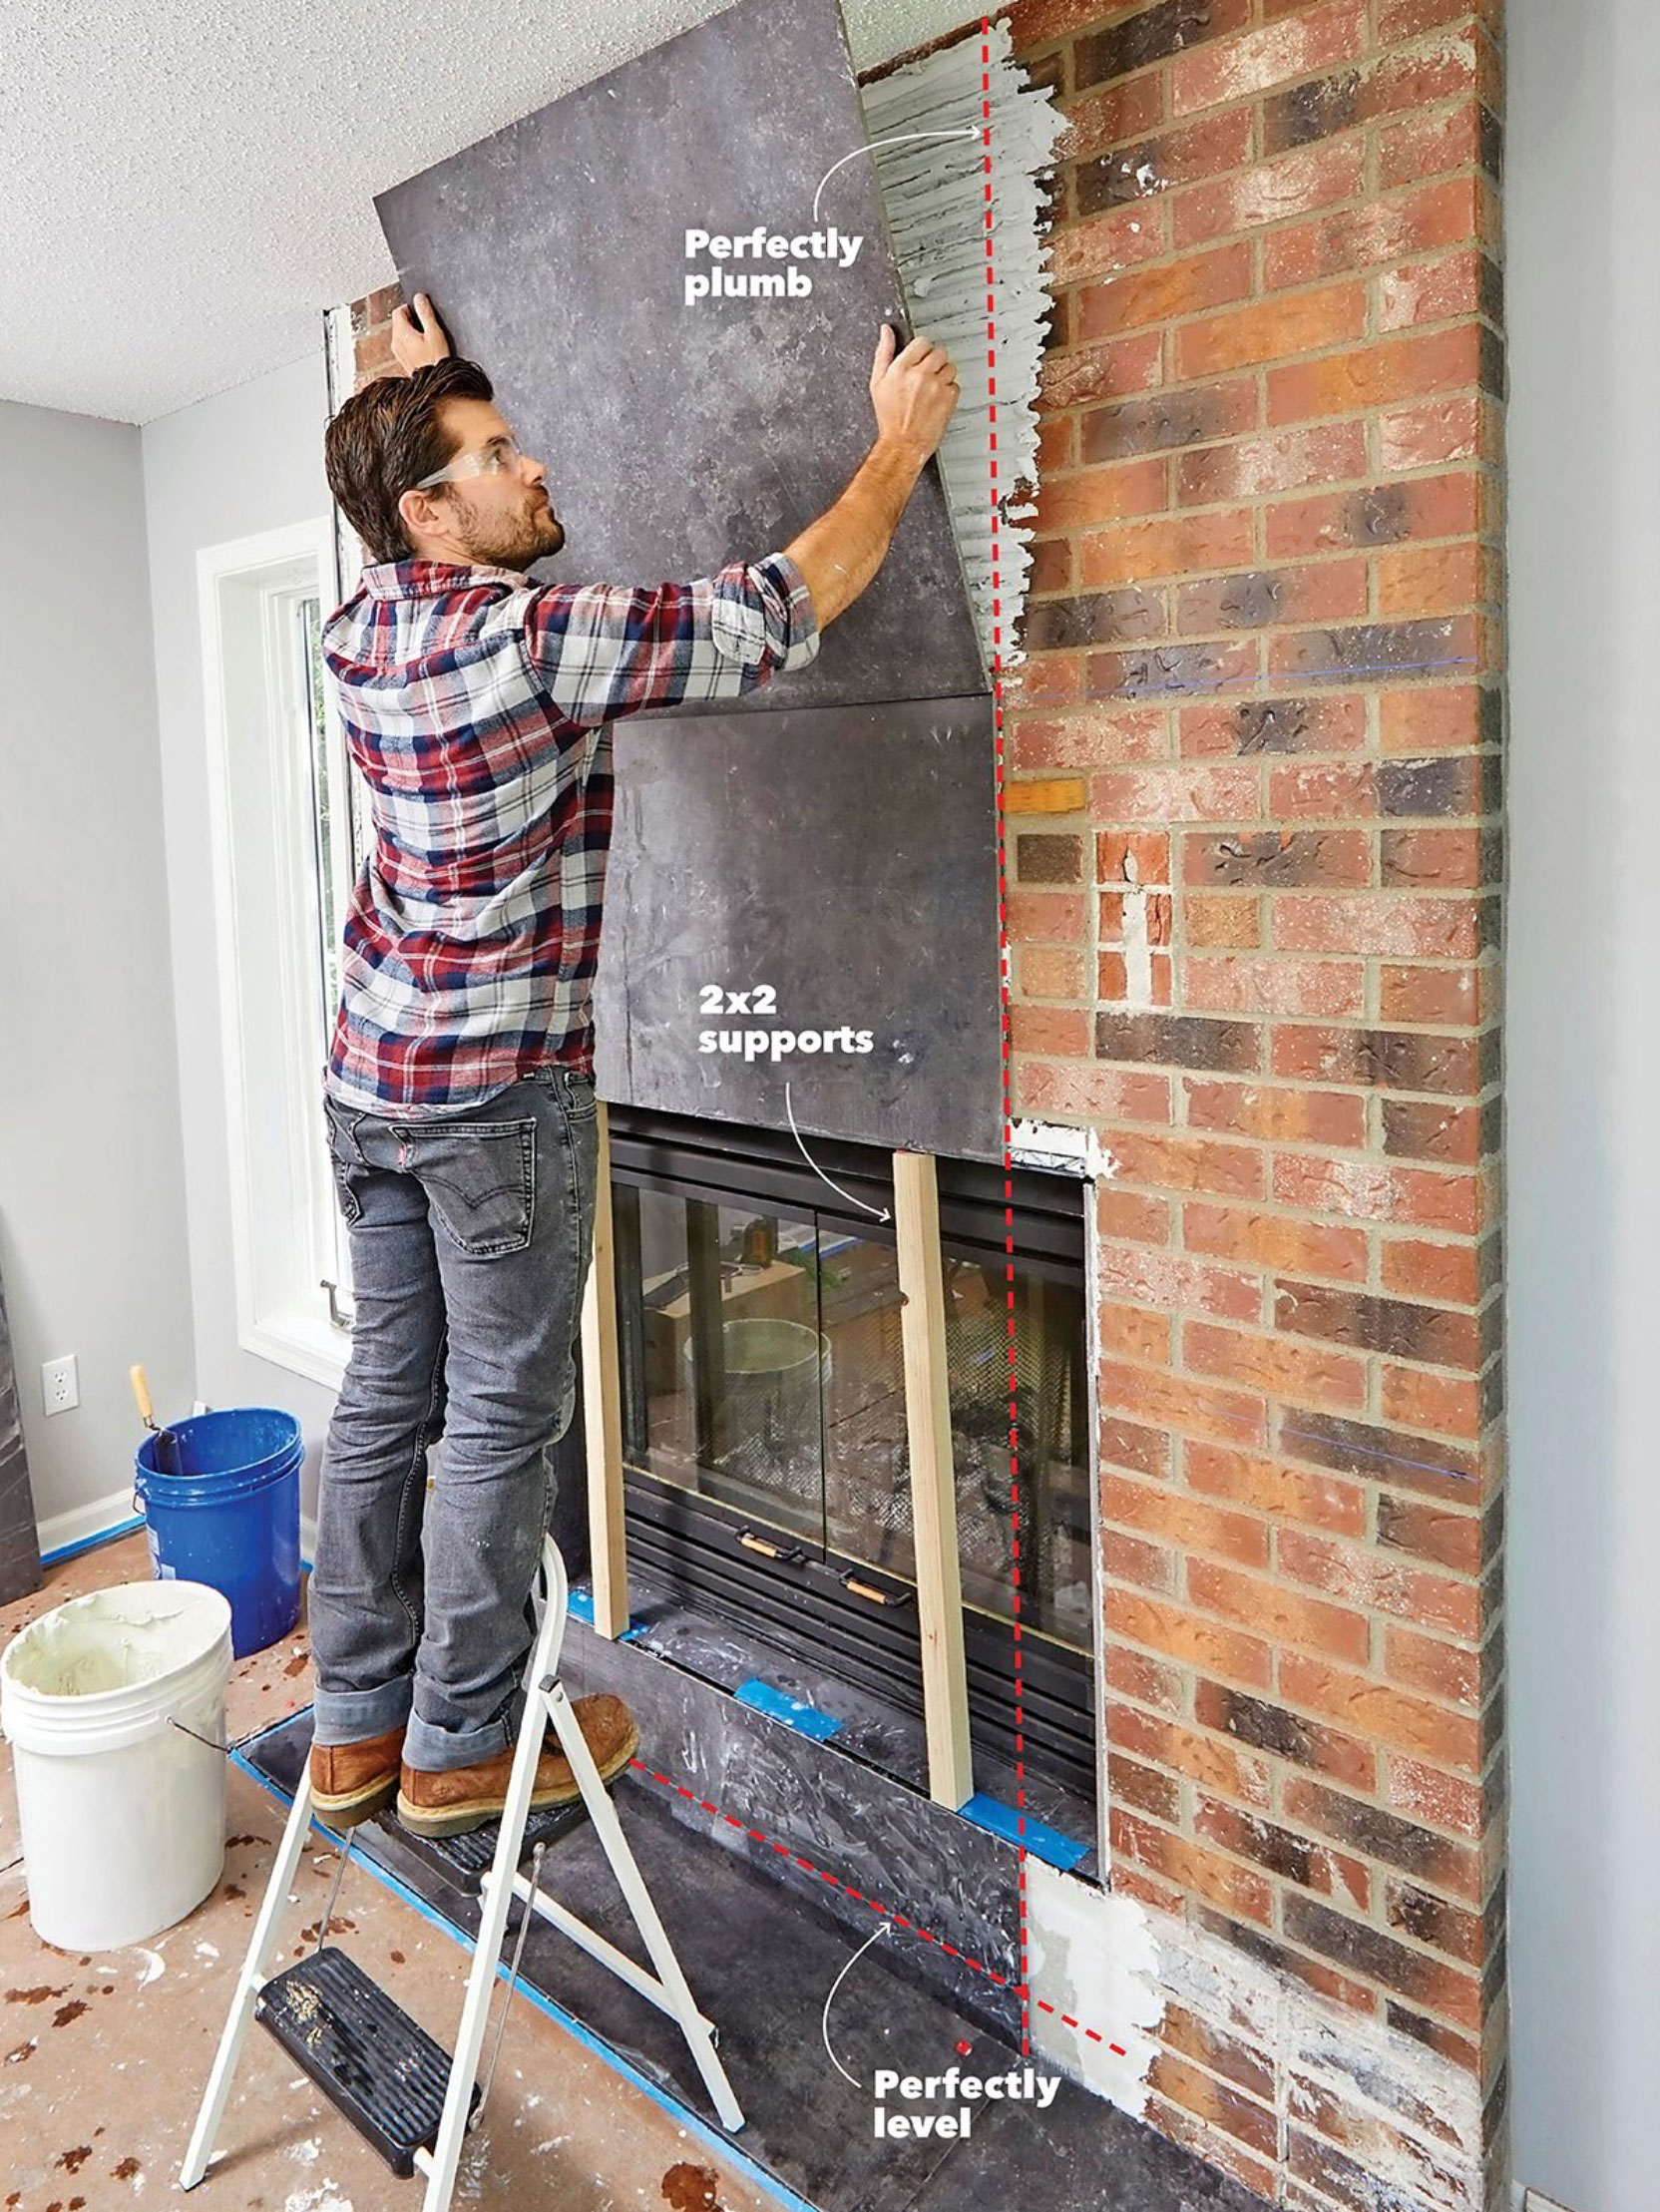
Step 11: Begin in the middle
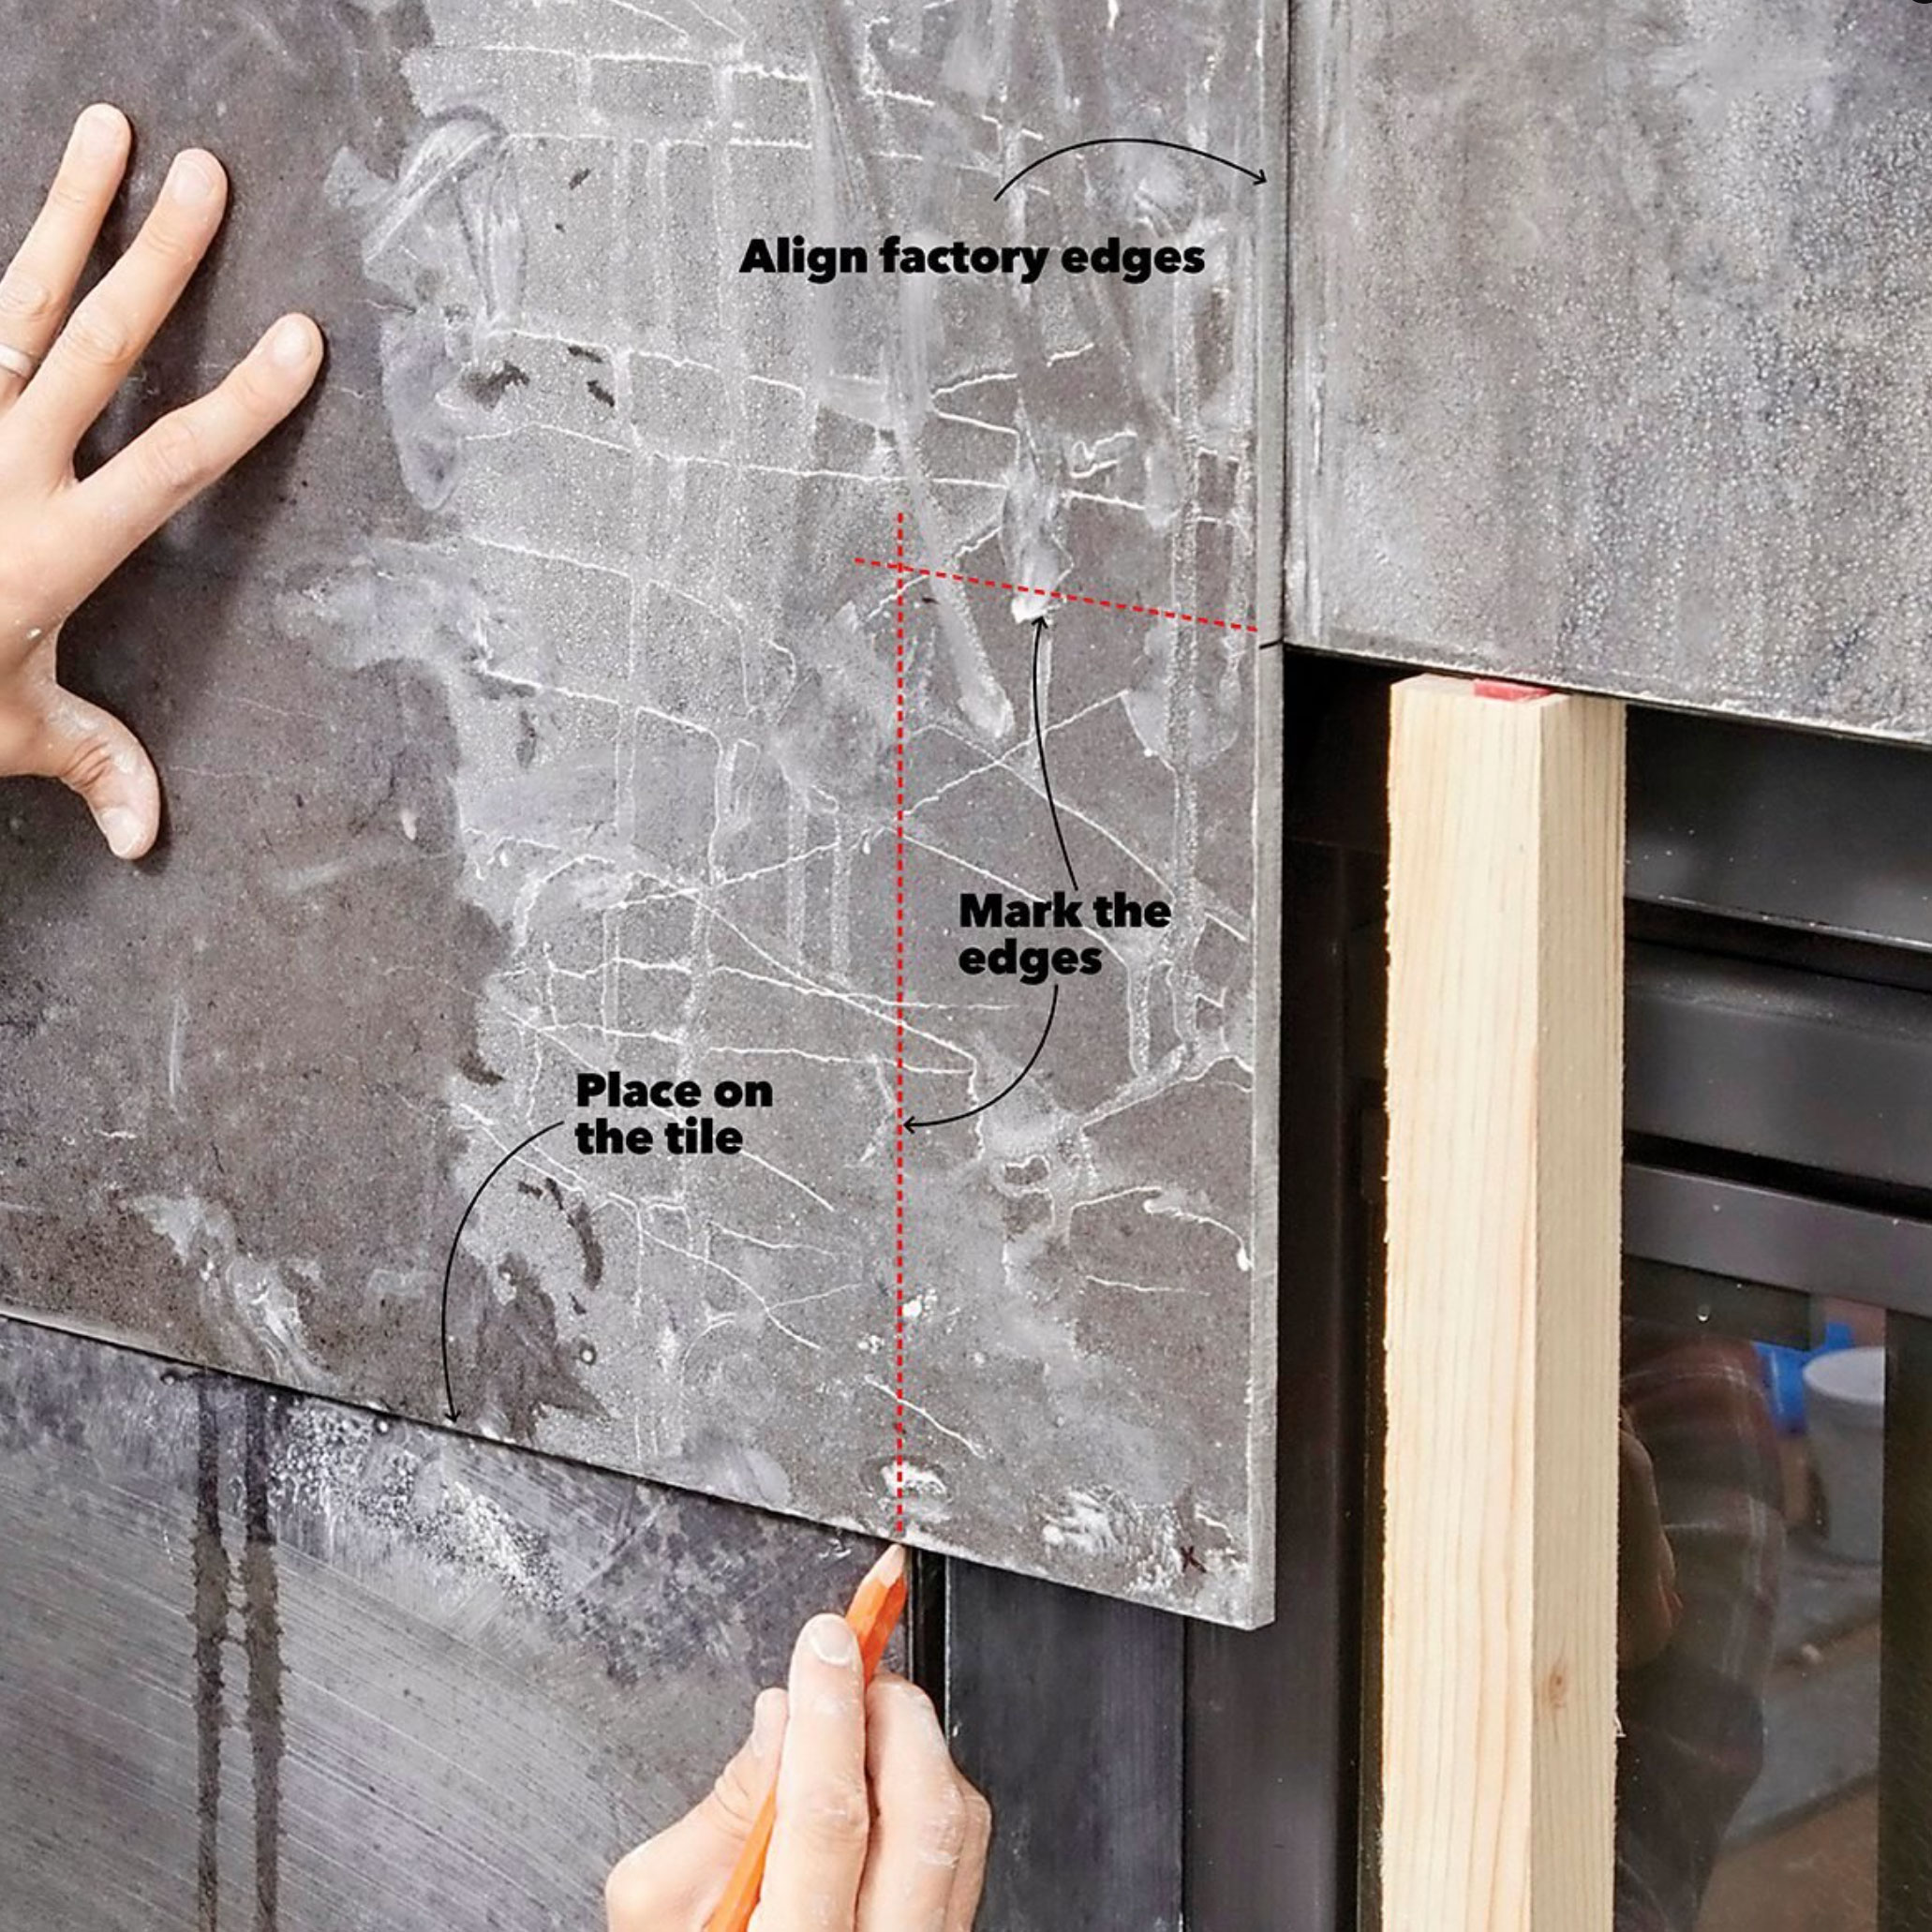
Step 12: Make precise marks