Backyard basketball

Backyard basketball
Getty Images

A garage hoop is great. And certainly, if you live near a park, you can play full- or half-court games with actual court lines. But what if you could build your own? How cool would that be?

You can! It’s a big project, but doable with helpers and planning. We’ll walk you through the basics to give you an idea of what you’re getting into.

See more Aussie backyard ideas and improvements.

Advertisement

Planning your backyard basketball court

Planning your backyard basketball court
Getty Images

With a project this size, it’s critical to begin with a well-thought-out plan. Before you pick up a shovel or concrete form, map out your ideas with software like SketchUp, and investigate how much this whole thing is going to cost.

Here’s where to start:

Choose the size

Decide how much space you can dedicate to your court. Compared to football or baseball, basketball requires a smaller playing surface, but you’ll need to give up part of your yard.

According to the International Basketball Federation (FIBA), a full size court is exactly 28 by 15 metres, while in the National Basketball Association (NBA), the court is 28.7 by 15.2 metres. If you can do that, wow! Congrats!

If that’s too big, cut it down to a half-court or even smaller. The FIBA 3×3 regulation sized half court is 15m x 11m. If a half-court won’t fit in your yard, scale it down to whatever dimensions you can accommodate. In Australia, ‘half-court’ sizes range from about 7 metres in height (to fit the ‘free-throw line’, or 9m (to fit the ‘three-point line’) and 4-5 metres in width and upwards. Some popular sizes include 10m x 7m or 9m x 5m. Don’t forget to allow for room to run out of bounds.

Follow thse 24 tips for planning the perfect garden.

Choose the playing surface

Choose the playing surface
Getty Images

Backyard basketball courts usually start with a concrete slab, which you can play on or cover with other materials. Here are some popular options:

Modular tiles: Interlocking polymer tiles sit on top of the slab. They’re easy to snap together and provide great drainage.

Acrylic: Durable acrylic coatings can be applied to the slab with or without cushioning systems underneath the custom-colour playing surface.

Asphalt: Most of us have played on an asphalt court; it’s a common choice for schools and parks. It’s softer than concrete and relatively inexpensive compared to other options. But it doesn’t last as long.

Get a permit

Any time you’re planning construction on your property, particularly a project as large as a basketball court, call council and check their website to see if you need a permit.

Draw up your plans before you apply. Verify any easements to your property boundary. And if you plan to take down trees, make sure that’s covered in your permit application as well.

Building your backyard basketball court

Building your backyard basketball court
Getty Images

Before you start your project, contact Before You Dig Australia (BYDA), to have any underground utilities marked. Calculate the amount of fill, concrete or asphalt you’ll need for the court and schedule a delivery.

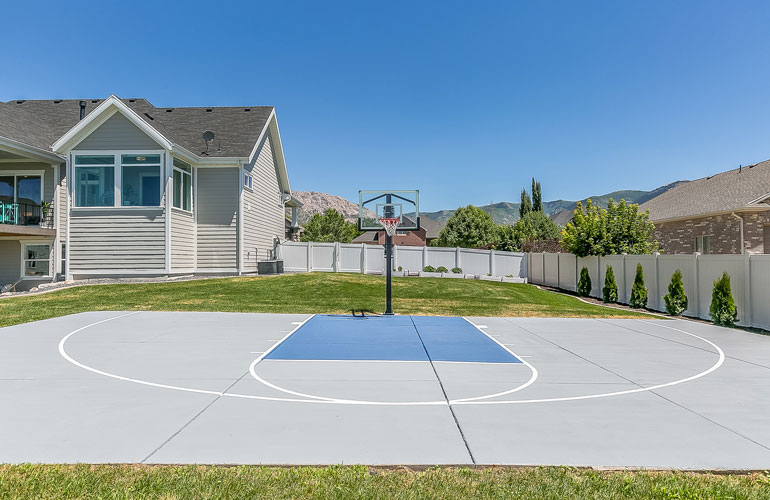
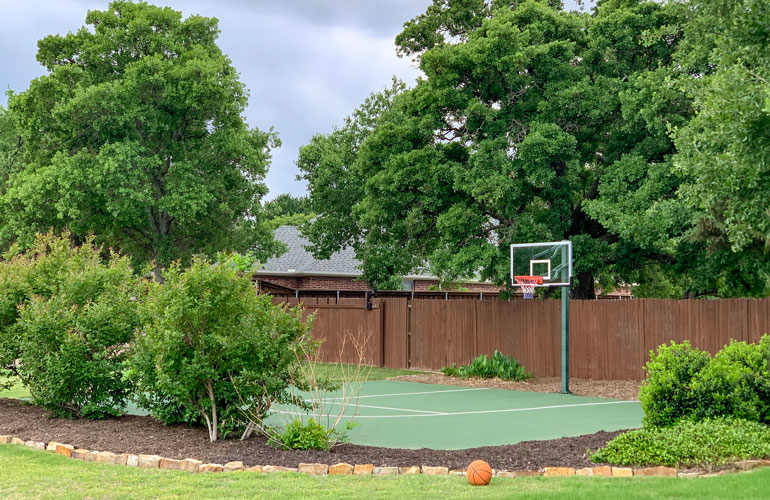
Option 1: Concrete slab

This is the foundation of most backyard basketball courts, and it’s hard work. Enlist a few helpers if you’re pouring the slab yourself.

For half-courts or larger, it may be worth it to hire pros. At the least, rent a skid steer to make your job easier if you have a lot of dirt to move.

Here are the basics:

Mark the corners of your court and check the slope with string and a level.

Remove vegetation and level the ground by adding or removing dirt. Depending on how much dirt you want to haul away, you can build up the court from ground level or dig down so it’s flush with the ground.

Set concrete forms and square the corners. Allow a 2% slope for rain to drain off before staking in the forms around the perimeter.

Add gravel fill to 100mm below the top of the forms. Tamp down the gravel. Add rebar or steel mesh.

Pour concrete from one end of the form to the other. Wear rubber boots and drag the concrete toward you with a 2×4 screed and rake, levelling the concrete to the top of the perimeter forms.

Smooth the surface with a float. Do finishing work and cut control joints to prevent random cracking.

Option 2: Asphalt court

Instead of pouring a concrete slab, you can install asphalt. If you’ve ever seen a highway or driveway put in, you know this isn’t as DIY-friendly. To get that smooth surface, ashphalt should be levelled with a 1-3 tonne roller.

Installing asphalt is messy work, too, due to its composition of gravel, sand and sticky binders like bitumen.

Just like concrete, the base is key. You’ll need well-compacted soil, plus a tamped or rolled gravel layer. Drainage on top of the court is also important, because water pooling can reduce its life. Unlike concrete, you don’t need forms to install asphalt because the edges are sloped into the ground.

If you’re going with an asphalt court, hiring a contractor will probably be your best bet.

Add playing surface

Add playing surface
Getty Images

Depending on the surface you chose, when the concrete cures, add your playing surface or paint lines if you’re sticking with concrete. Modular tiles ship disassembled so you can fit them together like a puzzle. This is the most user-friendly of the playing surface options.

If you choose an acrylic playing surface, you can hire someone to apply the surface or DIY. These applications start with a primer and resurfacer, which prepare the court and help with adhesion. Next comes multiple cushioning layers, and finally the acrylic surface layer

If you choose an asphalt court instead of concrete, there’s nothing more to do except add the boundary lines with paint. All lines should be 5cm in width and should be painted in a single colour throughout (usually white).

Add basketball hoop

Add basketball hoop
Getty Images

By now, you should know what kind of hoop you’re installing. Portable goals are inexpensive and work well. But if you’re building your own court, you might as well add a permanent goal that sits on a footing. These are available from brands like Goalrilla and Spalding.

Follow the instructions that come with your goal, but in general you’ll need to dig a 90-120cm footing. Do this with a post-hole digger. Or, to make it easier, rent or invest in an auger.

The goal footing should be close to but separate from the court itself, to prevent vibration. Once you dig the hole, insert a concrete form and pour concrete into the hole. Sink the anchor system that comes with the goal into the concrete, making sure it’s centred and level. Once this cures, grab a helper and bolt the goal to the anchors.

Add lighting and landscaping

Add lighting and landscaping
Getty Images

Now that you have a court, you want people to watch you play, right? Spruce up your court by adding benches for spectators as well as landscaping to integrate the court into your yard.

Keep in mind that for safety, leave at least a metre of unobstructed out-of-bounds space around your court. Three metres is preferred.

And finally, depending on the size of the court, your porch light probably isn’t going to cut it for night games. If you’re installing a permanent basketball goal, install floodlights on footings around the perimeter.

Now learn some cheap landscaping fixes that look expensive.

Sign up here to have Handyman’s favourite stories straight to your inbox. 

Source: RD.com

Sign up for emails