Early autumn is the changeover time when it comes to growing vegetables, so it’s time to pick the last of the summer produce and plant the new autumn and winter crops.
A bit of work done in the garden now will ensure you have a good harvest during the cooler months. Here’s how to sow and grow vegies, greens and herbs for fresh ingredients to add to soups, stews and more.
1. Harvest crops
The first job is to pick all of the remaining crops, and either enjoy them now or preserve them for future use. You can make sauce from excess tomatoes, or oven-dry them.
Freeze surplus basil by tearing the leaves, putting them in ice-cube trays and covering with water.
The frozen leaves can be used in winter soups and stews simply by adding the ice-cube to the pot with the other ingredients.
Trim herbs such as oregano and marjoram, then hang the clippings in a warm, dry spot indoors. Store the dried leaves in an airtight container.
2. Prepare the patch
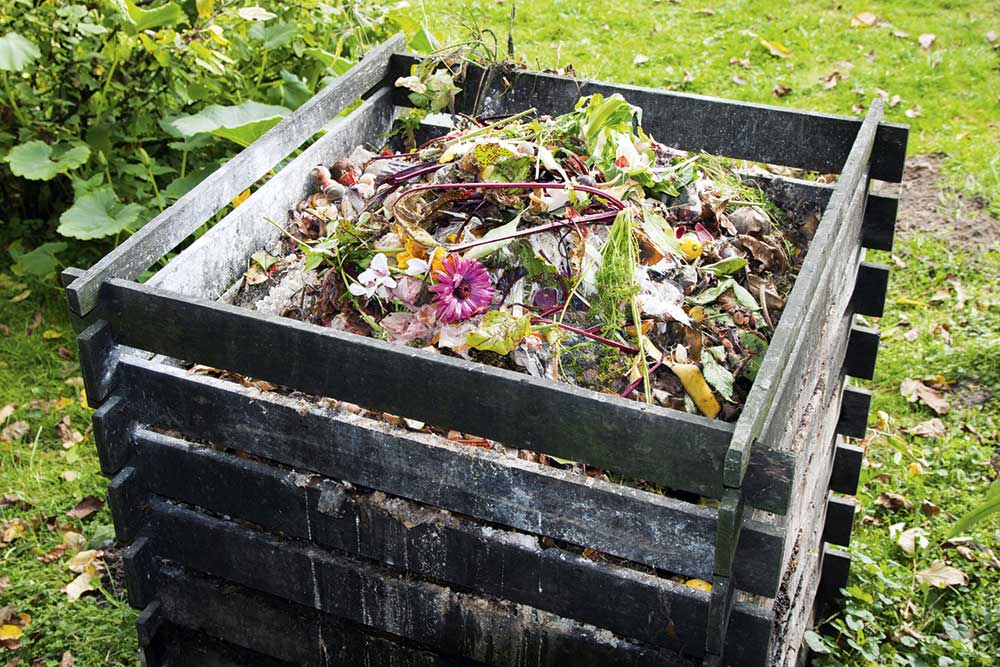
Remove all the finished plants from the vegetable garden and put them on the compost heap. Pull up any weeds, making sure you get the roots as well.
Weeds compete with plants for soil nutrition and leave them open to attack by insects and diseases.
Dig the whole patch with a fork or spade, incorporating any remaining mulch into the soil.
Break up the clods until you have a nice crumbly soil.
3. Test the pH
The majority of vegetables like a soil with a pH of about 6.5. And as soil has a tendency to slowly become acidic through fertilising, it is always a good idea to test it every couple of years.
Checking soil pH is easy with a testing kit. If it is too acidic you can rectify it with dolomite, garden lime or a liquid lime.
Make sure you follow the directions on the packet.
4. Condition the soil
Before planting, the soil will need conditioning with mushroom compost, or cow or chicken manure.
Dig the compost or manure lightly into the soil, then rake it, making sure it is crumbly, level and smooth. It will eventually break down, supplying the soil with beneficial organic matter.
Conditioners also encourage earthworms, which break down root mats and open up tunnels for oxygen and water to penetrate the soil.
The plant roots take nutrition from the nitrate-rich mucus that coats these tunnels.
Compost is free and makes a great conditioner, as it helps to regenerate the soil and increases the water-holding capacity by at least 30 as well.
And by recycling organic waste, you’re keeping it out of landfill. Seaweed products are also soil conditioners.
Often mistaken for a fertiliser, liquid seaweed promotes beneficial micro-organisms in the soil, which in turn boosts the health of the plant.
5. Water the bed
Give the bed a good watering at least a day before you plant. This will help the manure and compost to break down and settle prior to you planting seeds or seedlings.
6. Spread with mulch
Adding a mulch, such as sugar cane, lucerne hay or pea straw, conserves moisture by reducing evaporation, prevents weed growth by restricting light and modifies the temperature of the soil by cooling or warming it.
As the mulch breaks down, it adds structure to the soil by supplying it with beneficial organic matter.
What to plant
- Beetroot
- Broad beans
- Broccoli
- Cabbage
- Carrot
- Cauliflower
- Endive
- Kale
- Leek
- Lettuce
- Onion
- Peas
- Silverbeet
- Spinach
- Turnip
Growing in climate zones
Depending on whether you live in a hot or cold region, you need to choose the vegetables that will thrive in local conditions during winter.
Cool and temperate areas
- Radishes
- Kohlrabi
- Shallots
- Spring onions
- Brussels sprouts
Subtropical and tropical areas
- Cucumbers
- Beans
- Tomatoes
- Parsnips
- Egplants
- Capsicums
Herbs to plant
The following herbs are perfect for winter staples such as soups, stews and casseroles.
- Rosemary
- Bay
- Sage
- Oregano
- Thyme
- Coriander
- Rocket
- Mizuna
- Chervil
- Parsley
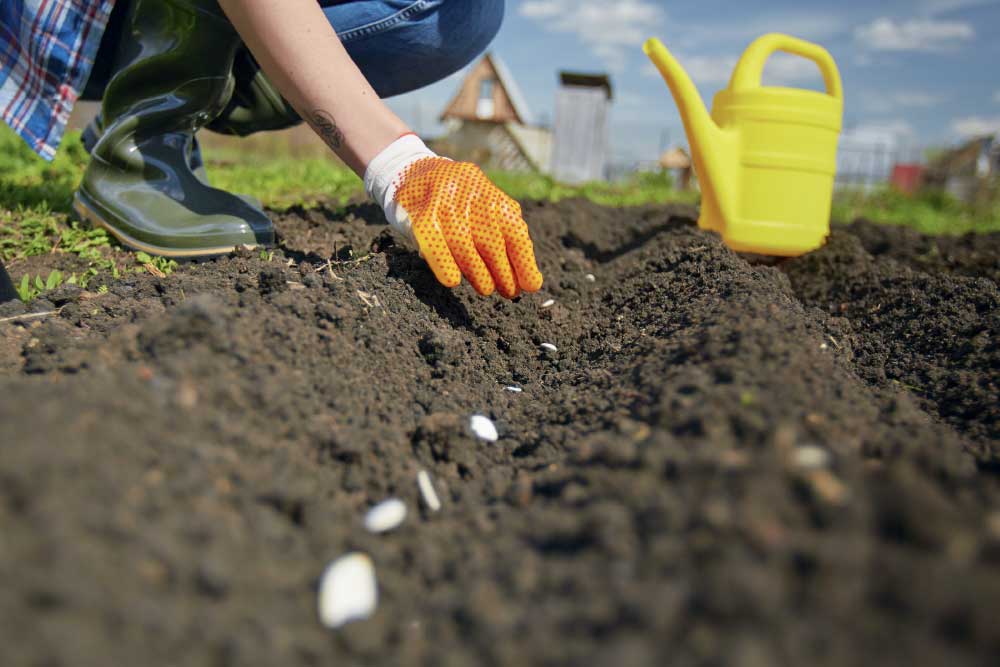
Sow the seeds
There is a greater variety of vegies to choose from if you grow them from seed. It’s also less expensive, as a packet of 50-100 seeds costs the same as a punnet of 6-12 seedlings.
If you seal and store the packet, you’ll have about three years’ supply.
Certain vegetables grow better from seed, planted directly where they are to grow, rather than from transplanted seedlings.
Direct-sow broad beans, radish, silverbeet, peas, Asian greens, spinach, parsnip, beetroot and carrot.
You can buy propagating sets to get your seeds off to a good start, but an even cheaper alternative is to re-use seedling punnets as a DIY propagator or mini greenhouse.
Place plastic wrap or a clear plastic freezer bag over the seed container, then seal it. Remove the plastic when the seeds have germinated.
Cardboard egg cartons make great punnets for large seeds. Fill them with seed-raising mix and plant a seed in each section. When they’ve germinated, cut out the individual sections and plant them in the ground.
The cardboard will soon break down in the soil and your seedlings won’t suffer transplant shock.
Seed tapes, which are strips of soft paper containing evenly spaced seeds, are easy to use and effective. You simply lay the tape in the ground, cover it with soil, then water it.
TIP Water transplanted seedlings with a seaweed concentrate to help prevent transplant shock.